3DNature

3D Landscape Design & Visualization Software published and supported by AlphaPixel

Menu

NLCD Part 4

NLCD Template Project Use

Part 4. GeoTIFF Cropping Techniques

Note: The NLCD Template project and all data referred to in this tutorial are available on the free NLCD Data Set download.

In this, the last section of the tutorial, we are going to concentrate on issues and techniques relating to the cropping of GeoTIFF images without losing their georeferencing information. This is not necessarily limited to use with the NLCD data, but will certainly be of use should you wish to implement NLCD-based projects using the larger of the GeoTIFFs. The NLCD coverage data for Colorado alone is 345Mb, and it is unlikely that in most cases you would wish to have the memory overhead of such a large bitmap when visualizing a small area of the state. These techniques apply to any GeoTIFF, and involve only some mathematics and use of some GeoTIFF related software, freely available from the Internet.

Of course, should you own any one of a number of dedicated image cropping and referencing tools – for example, ERMapper – this job will be made a whole lot easier for you, and this part of the tutorial should serve little more than esoteric interest! If, however, you do not have access to that sort of raster manipulation software, and have to make do with a freeware copy of Paintshop Pro, or similar, then these techniques will prove invaluable.

1. Search the internet to find and download GeoTIFF Examiner, formerly of Mentor Software (it was sold some years ago so who knows where it is now ;). Run the executable to start the setup process and install the program to your hard drive.

2. Search the internet to find and download GeoTIFFcp.exe and ListGeo.exe. Make sure the release version is newer than 1.15 – earlier versions had a bug.

3. Run GeoTIFFExaminer and you should see the following interface:

4. Click the Browse button to the right of the filename entry box. When presented with a file open dialog, browse to the location of your Rhode Island NLCD GeoTIFF, rhode_island.NLCD.tif. There should be a copy in your WCSProjects:NLCDTutorial1 folder. Select the file, and click Open. The interface should change to display the following:

5. You will notice that a range of values have been read out of the GeoTIFF file and entered into the textboxes along the left-hand side of the interface. Click on the GeoTIFFExamineButton2.gifbutton between the sections for GeoTIFF File, and World File. This converts the data drawn from the embedded georeferencing information into the format consistent with the contents of a .tfw file, or TIFF World File. At this point your interface will look like this:

6. Click the button marked Write New World File and the only thing that should change is that the line of text at the top of the World File section should now read Corresponding World File Exists.

7. If you locate your WCSProjects:NLCDTutorial1 folder on your hard disk, using Windows Explorer or a similar tool, you should find a file called rhode_island_NLCD.tfw. This is our newly created world file. GeoTIFFExaminer has given the file the same name as the TIFF to which it corresponds. This is necessary for GeoTIFF-aware programs to associate it with the correct raster file. So, what does the file contain? Run Notepad or any similar text-editing tool. Select File>Open from the main menu and locate rhode_island_NLCD.tfw. Click Open and you should see the following:

8. What do all these numbers mean? Well, here’s where we have to go into a bit of an explanation about what we want to achieve with them, as well as what they represent:

In order, the fields are:
X Pixel Dimension (Listed in GeoTIFFExaminer as XVectorX)
Rotation (Listed in GeoTIFFExaminer as XVectorY)
Rotation (Listed in GeoTIFFExaminer as YVectorX)
Y Pixel Dimension (Listed in GeoTIFFExaminer as YVectorY)
Image X Origin (Listed in GeoTIFFExaminer as World Ref. Point X)
Image Y Origin (Listed in GeoTIFFExaminer as World Ref. Point Y)

Ignore the rotation fields. Everything else does.

The origin fields specify the coordinates (in whatever coordinate system the image uses) of the center of the upper-left pixel in the image.

The X & Y pixel dimension field specify the size of one pixel (in the coordinate system units). The Y is stored as negative, for reasons that make sense to only a select few.

From this, you should be able to see that we could crop off any part of the right or bottom of the image and not have to rewrite the World File. Most likely you’ll crop from all sides in a common operation, so your upper left pixel coordinates will change.

This is where that mathematics comes in, and we also get to utilize the other utilities that you downloaded at the start of the tutorial:

9. The GeoTIFF has two interesting pieces of data in it: the definition of the coordinate system, and the bounds of the image. However, as we have seen, it doesn’t have the bounds in the way we’re accustomed to thinking of them, it has the coordinates of the pixel in the upper left of the image (ULX and ULY), and an X and Y dimension of each pixel in the same units (PixelSizeX and PixelSizeY). So, the coordinates of the lower right corner (LRX and LRY) are:

LRX = ULX + ((Width in pixels)* PixelSizeX)
and
LRY = ULY + ((Height in Pixels)* PixelSizeY)

There’s some oddities here that I’m not covering just yet, but that’s the gist of it. If you know the coordinates of the upper left pixel, the pixel dimensions and the number of pixels in each direction, you can determine the coordinates of the lower right pixel.

When you crop the image, the coordinate system data should remain unchanged. The upper left coordinates might or might not change (depending on if you cropped anything off of the top or left sides of the image). The pixel size will not change. This should make recalculating the new values for a cropped version of our world file relatively simple.

10. Run your preferred image editing software – I shall be using Adobe Photoshop, but any tool that allows you to accurately position a cropping boundary will be just as suitable. Select File>Open from the main menu and locate rhode_island_NLCD.tfw in the WCSProjects:NLCDTutorial1 folder.

11. When the file has loaded, use your cropping tool to crop the image so that we are focusing on a small area surrounding the southernmost island (Block Island). Here’s a screen grab of the image in Photoshop with my cropping boundary defined:

12. I was able to measure the coordinates of the upper left pixel of this region before cropping and determined the following:

  • ULX = 1255
  • ULY = 2963
  • Image dimensions = 258 by 366 pixels (X by Y)

Should you want to follow the tutorial, but wish to use the file I created, you can find the file on the NLCD CD ROM in the Support Files folder. It’s name is Cropped.tif.

13. Our cropped file now has no georeferencing or coordinate system information, since it has been edited and re-saved in a software product incapable of understanding or even noticing the hidden metadata. It is our job now, understanding what we have already discussed, to insert this information back into our TIFF file to turn it back into a GeoTIFF!

14. We can now calculate the X and Y coordinates of the upper left pixel of our cropped image:

NewOriginX
=
OldOriginX
+
(
OffsetPixelsX
*
PixelDimensionX
)
 
=
1968945
+
(
1255
*
30
)
 
=
1968945
+
 
37650
   
 
=
2006595
      
         
NewOriginY
=
OldOriginX
+
(
OffsetPixelsX
*
PixelDimensionX
)
 
=
2374095
+
(
2963
*
-30
)
 
=
2374095
+
 
-88890
   
 
=
2285205
      

So now our new world file would look like this:

30
0
0
-30
2006595
2285205

Enter these values into an empty textfile, and save it in your NLCDTutorial1 folder as Cropped.tfw. Again this file has been provided on your CD-ROM in the same folder as the cropped TIFF. Copy the Cropped.tif file from the Support Files folder on your CD ROM to the NLCDTutorial1 folder also – the .tfw file needs to be in the same folder as the .tif to which it refers.

Be aware that if you use Notepad or similar to save the new file, it will default to adding a txt extension to the filename that you enter. If your world file ends up being listed as Cropped2.tfw.txt, then either edit the filename to remove the txt extension, or when saving the file, select All files from the Show Files of Type drop down list:

15. To use this in VNS, we need three things:

  • The cropped (not Geo)TIFF image
  • The World File, named properly so VNS will automatically find it (Imagename.tif & Imagename.tfw)
  • Some sort of coordinate system definition (since the World File doesn’t have that info, and Photoshop ate it along with the other GeoTIFF info).

We have the first two already. The third is provided on the NLCD disk, and should have been installed along with the other components we have already accessed (cameras and the like).

Note: Images in other systems like UTM may have a variety of different coordinate systems (all UTM, but with different zones) for different areas across the country or world. This is not the case with NLCD’s Albers system.

16. Run VNS.

17. Select File>Open from the main menu and locate NLCDTutorial1.proj

18. Click on the Image Object Library button ImageLibrary.gifon the main toolbar.

19. Locate rhode_island.NLCD.tif in the image list and left-click on it to select it. Click the Delete Image Delete.gifbutton to the right of where it says Image Object in the top left of the library.

20. When prompted to confirm deletion of image, click OK.

21. When reminded that the image is used as a Color Map, click OK.

22. The image should be removed from the library list. Click the Add Image Object to Library… button AddNewItem.gifto the right of where it says Image Object in the top left of the library.

23. In the file requester that appears, navigate to locate the Cropped.tif file we created or copied from the CD ROM in Step 14.

24. Select Cropped.tif and click Open.

25. When prompted to use the image’s coordinate system for rendering and viewing, answer No. This has been wrongly identified as UTM NAD27 since the metadata defining the coordinate system was destroyed during the cropping process in our image editing software. The georeferencing information is still there, in the form of the World File that we created in Step 14, but we have to tell VNS to use the correct coordinate system for the Color Map image. Fortunately, although we deleted rhode_island.NLCD.tif from our image library, we did not delete its associated coordinate system, so we should be able to use that one!

26. With Cropped.tif selected in the Image Object Library, click the Georeference tab. The Coordinate System drop down list should be displayed as UTM – NAD27. Click on the list and select the one called GeoTIFF: IMAGINE GeoTIFF Support. Close the Image Object Library.

27. Click the Landcover Task Mode button TaskModeEcosys.gifat the top of the Scene-At-A-Glance. Expand the Color Maps category and double-click on the Rhode Island Cmap (Color Map) component to open its editor.

28. Click on the Image Object drop down list and select Cropped.tif from the list.

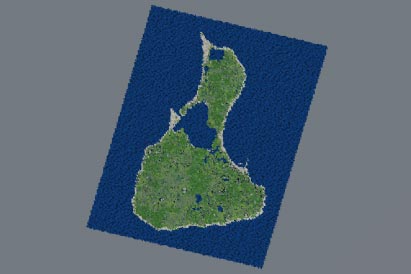
29. Your Planimetric View should update to reflect the new bounds of the color map image:

The rectangular area covered by the color map will appear skewed, because the original coordinate system the NLCD image used (Albers) does not necessarily have north as straight up in the image.

30. Select the Planimetric Cameras View window so its title bar is highlighted blue, then click on the Zoom Box button ZoomBox.gifon the main toolbar.

31. Click and drag a box around the color map area in the Planimetric view to zoom in on it. Hit F9 to create a preview render, it should look something like this:

32. For NLCD template usage and cropping of NLCD coverage images, the above techniques are all you need to know about. But what if you wanted to create a new series of cropped NLCD images to use regularly, and you wanted to re-embed the coordinate system metadata, and do away with the world file? There is a way, as I mentioned at the start of the tutorial, but it involves the use of a couple more utilities – the ones we downloaded in Step 2. Warning! This process is not for the faint of heart, or those unfamiliar with using command-line (DOS Shell) type utilities.

33. We have already looked at and used GeoTIFFExaminer, which lets you look at the bounding coordinates of a GeoTIFF and/or world file, and transfer the data into or out of the world file or GeoTIFF. The other two utilities are Listgeo.exe which will dump ALL of the interesting coordinate system and bounding info from a GeoTIFF to the command line, and Geotiffcp.exe which will take the output from listgeo and cram it back into a TIFF file to make it a GeoTIFF.

34. Run your preferred file browsing utility and navigate to the folder where you extracted the GeoTIFF utilities to in Step 2. Copy the contents of this folder to your WCSProjects:NLCDTutorial1 folder.

35. Run a command prompt and change directory to focus on the WCSProjects:NLCDTutorial1 folder.

36. Run Listgeo.exe and pipe its output to a text file, using the following syntax:

Listgeo rhode_island.NLCD.tif>CS.txt

37. This will create a file called CS.txt in the NLCDTutorial1 folder containing the coordinate metadata for the rhode_island.NLCD.tif – we can’t use the cropped TIFF, since the metadata is non longer there!

38. If you open CS.txt in Notepad or a similar text editor, you will see that Listgeo has created the file successfully. Unfortunately, due to reasons that I shall explain in a while, we still have some manual editing to do! The NLCD image files were all created using ERDAS Imagine software, which has written a whole bunch of text to two fields in the GeoTIFF metadata. With CS.txt open in your text editor, locate the fields called GTCitationGeoKey and PCSCitationGeoKey. You should see that there is a whole set of descriptive text defining the coordinate system, that begins GeoTIFF: IMAGINE GeoTIFF Support and some copyright data. This metadata covers several lines of text and is punctuated with at least 2 carriage returns. It is the carriage returns that will cause us problems if left as they are, since the geotifflib used by geotifcp.exe will throw an error when faced with embedded carriage returns or linefeeds. This will be solved in a future version of the geotifflib, but for now, edit the file, so that both the above fields read something like NLCD GeoTIFF. Resave the file when you are done.

39. Now return to your command line console and run geotifcp.exe using the following syntax:

geotifcp -g CS.txt Cropped.tif Cropped2.tif

40. Before you close the command prompt, rename the Cropped.tfw file to Cropped2.tfw by typing the following:

Ren Cropped.tfw Cropped2.tfw

41. Run GeoTIFFExaminer and click the Browse button to the right of the filename entry box. When presented with a file open dialog, browse to the location of your Cropped2.tif file in your WCSProjects:NLCDTutorial1folder. Select the file, and click Open. The interface should change to display the following:

Your path information will almost certainly be different to mine, but the rest of the interface should be identical.

42. As you can see, the world file data has been detected and inserted for us, all we have to do is click on the GeoTIFFExamineButton1.gifbutton between the GeoTIFF and World File sections of the interface, then click on the button marked Update referencing in TIFF file.

43. That’s it! Your GeoTIFF file is now complete, with embedded metadata for both the coordinate system and the georeferencing information. To test, delete the Cropped2.tfw file from your NLCDTutorial1 folder, and then switch to VNS, which should still have your modified NLCDTutorial1.proj loaded.

44. Open the editor for our Rhode Island CMap (Color Map) component and click on the Image dropdown list and select New Image Object…

45. When the file requester appears, navigate to the NLCDTutorial1 folder and select Cropped2.tif. Answer No to any coordinate system requesters.

46. This time, the file should not only load in the correct georeferenced location, but with the correct coordinate system too, showing that the file has all the necessary metadata embedded within its file structure. This file is setup for use in any GeoTIFF aware software, not just VNS.

These last steps involve the use of command line tools, and in many cases will not be necessary when using the NLCD Template project to perform visualizations. However, they are applicable to other GeoTIFF cropping situations, whether you intend to use the NLCD template project and VNS or not.

Hopefully you have gained some useful pointers as to how this is achievable without the purchase of multi-thousand dollar software, and will find it to be of use in the future.

Scroll to top