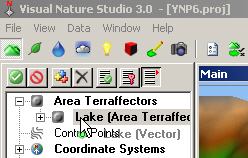
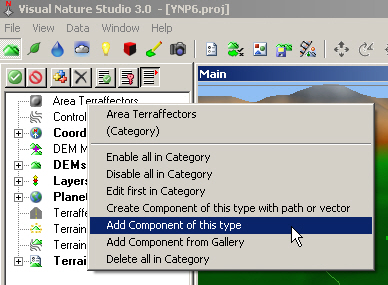
1. Lakes are a 2-step process if you’re not filling an existing depression. You dig out a lake bed with an Area Terraffector and add water with a Lake. Go to the Terrain Task Mode. Like many Components so far, we could use the Create button to make a new vector-Area Terraffector combo. But we already have the Lake vector, so select the Area Terraffectors category in the Scene-at-a-Glance and Add Component of this type.
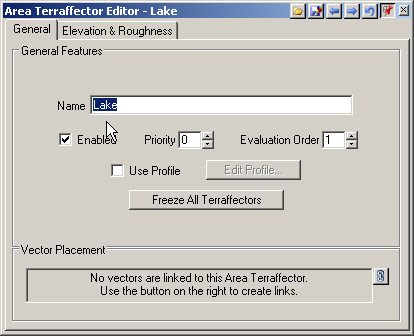
2. Name it Lake.
3. Expand the Area Terraffectors category.
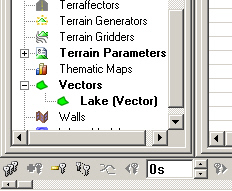
4. Move down to the lower Scene-at-a-Glance list and expand the Vectors category.
5. Click and drag the Lake Vector up and drop it on the Lake Area Terraffector. Confirm the operation.
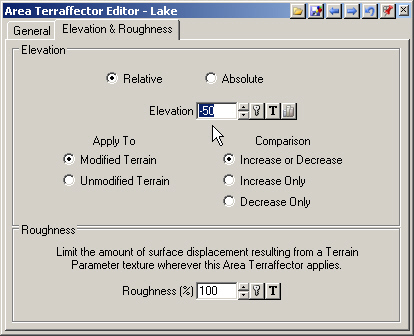
6. Go to the Elevation & Roughness page. An Area Terraffector will raise or lower terrain depending on the Elevation and whether it’s Relative to ground or an Absolute value. Leave the Lake Relative and make the Elevation -50 meters to dig a hole 50 meters below the terrain.
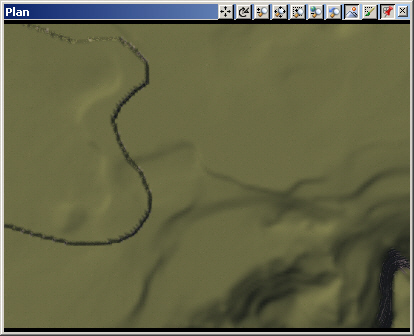
7. Save the project and render a Plan preview.
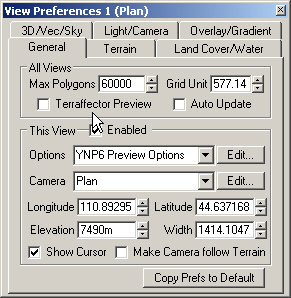
8. Switch back to realtime mode. VNS has Terraffector Preview that you can turn on from View Preferences. This can be useful when working with close views on small sections of high-resolution terrain. For large area effects, memory demands and detail limitations of realtime preview usually make preview renders a better choice.
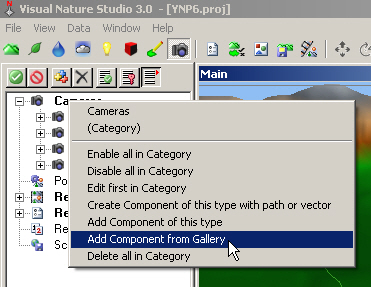
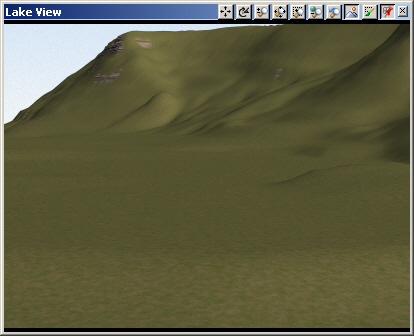
9. Let’s load another camera at the east end of the lake. Go to the Render Task Mode, Cameras category, and Add Component from Gallery.
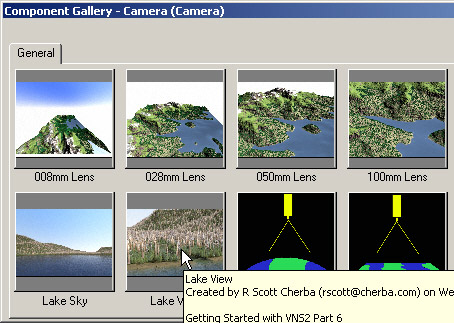
10. Load the Lake View.
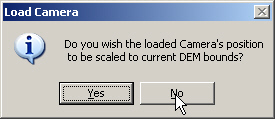
11. Do not scale the Camera’s position to the current DEM bounds.
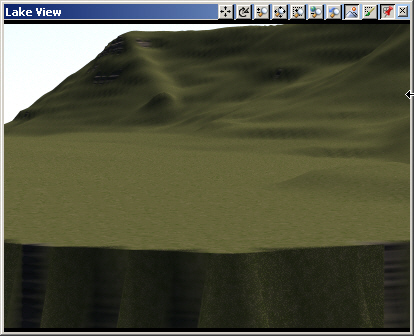
12. Open the Lake View Camera in the upper left view. Save the project and render a preview.
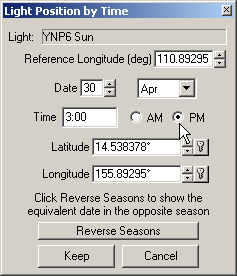
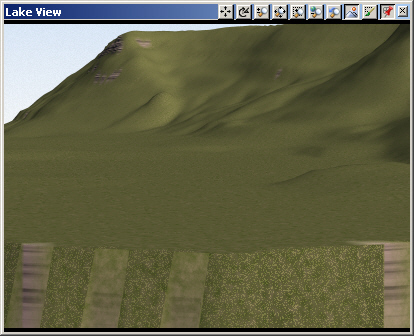
13. We can’t see much with the default morning light. Go to the lower Scene-at-a-Glancepane and open the Light Editor. Turn to the Position & Orientation page and change the time of day to 3:00 pm. Save the project and render a preview.
14. By default, Area Terraffectors raise or lower terrain with a vertical cliff. To create a gentle slope inward from the vector, we need an Edge Feathering Profile.
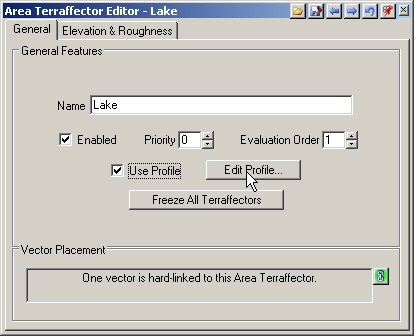
15. Bring Area Terraffector Editor forward. Turn to the General page, select Use Profile, and Edit Profile.
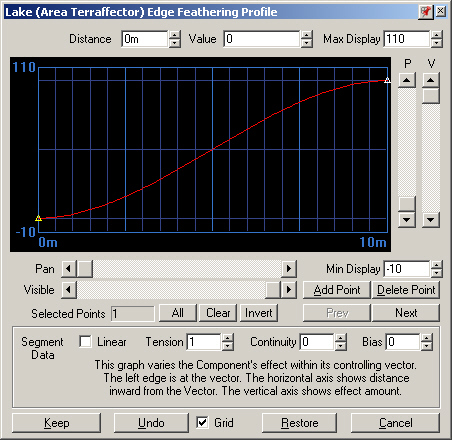
16. For an Area Terraffector, the profile starts at the vector on the left side of the graph. As we move right along the curve, we’re moving inward the vector. Think of the vertical scale Value as a percent of the Elevation we set, in this case -50 meters.
17. The default profile starts at Distance 0 and Value 0. That means no elevation change at the vector. The profile ends at a Distance of 10 meters and a Value of 100. That’s a full elevation change 10 meters in from the vector. That would be rather steep for our lake.
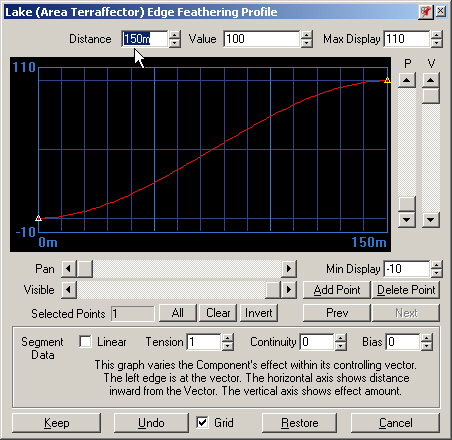
18. Select the right point and change its Distance to 150 meters, which would be more appropriate for a 50-meter-deep lake.
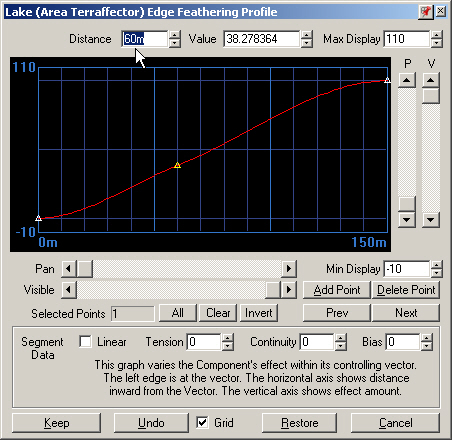
19. Select Add Point and click on the profile. Change the Distance to 60 meters.
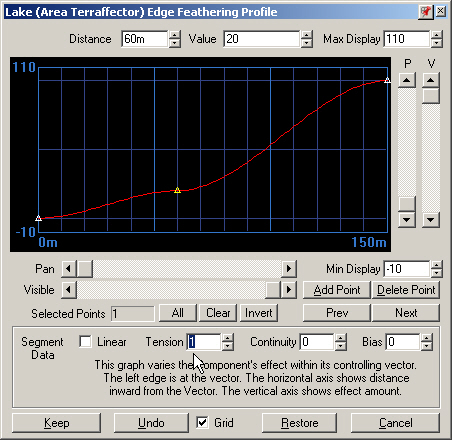
20. Change the Value to 20 and the Tension to 1. The lake bed will slope down to a depth of 20% of 50 meters, or 10 meters, flatten off briefly, then drop to its 50-meter maximum.
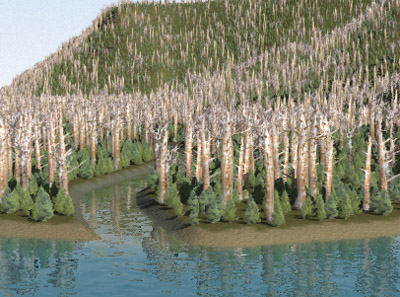
21. Keep the profile, save the project and render a preview. We now have a shallow slope at the edge of our lake bed.

![Screenshot of the Visual Nature Studio 3.0 interface, showing a project file named [YNP6.proj]. The software features various graphical and menu icons, with "Lake (Area Terrafactors)" highlighted.](https://3dnature.com/wp-content/uploads/2020/12/306c-00301.jpg)