3DNature

3D Landscape Design & Visualization Software published and supported by AlphaPixel

Menu

Part 10B. Post Process Rendering

Getting Started with VNS 3: Post Processes

Part 10B. Post Process Rendering

1. Go to the Post Process Editor General page. Deselect Preview Only to allow Post Process rendering to file. Save the project.
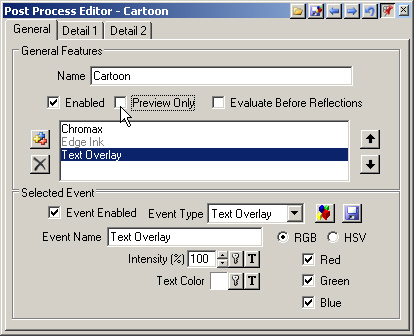
A software interface window titled "Post Process Editor - Cartoon" with options for enabling features, setting event types, and customizing text overlay properties including color and transparency.

2. Expand the Render Jobs and Render Options categories in the Scene-at-a-Glance.
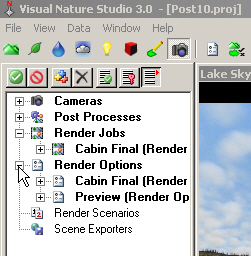
Screenshot of Visual Nature Studio 3.0 interface, showing project "Post10.proj" with folders for Cameras, Post Processes, Render Jobs, Render Options, Render Scenarios, and Scene Exporters.

3. Open the Cabin Final Render Job and rename it Lake Sky.
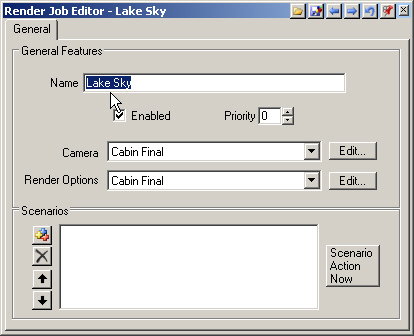
Render Job Editor interface for "Lake Sky" project, showing options to name, enable, set priority, and edit camera and render options. Scenarios section with action buttons is visible below.

4. Change the Camera to Lake Sky. Edit the Render Options.
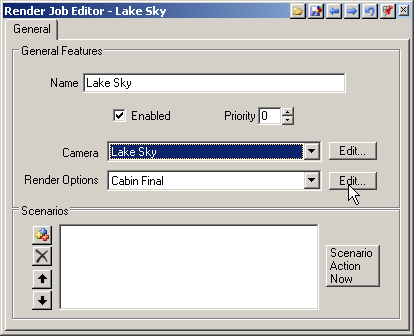
A screenshot of the Render Job Editor window titled "Lake Sky," featuring fields for "Name," "Camera," and "Render Options." Two "Edit" buttons and a "Scenario Action Now" button are visible.

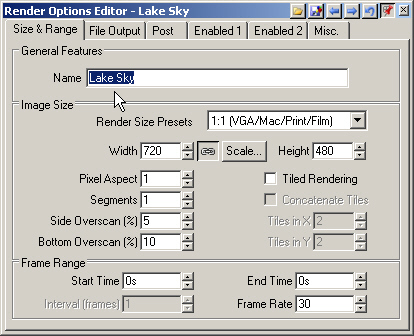
5. Rename it Lake Sky.

Screenshot of the Render Options Editor window showing options for size, range, file output, and general features such as render size presets and pixel aspect ratio. "Lake Sky" is entered in the Name field.

6. Go to the File Output page and change the Format to PNG. Change the Image File name to BeforePost. Select Save Before Post Processing.
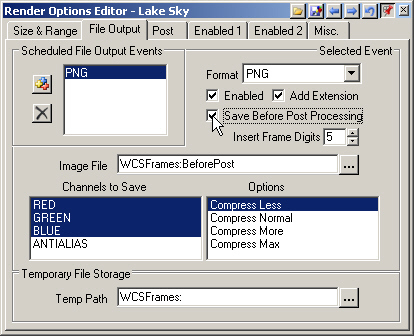
A screenshot of the Render Options Editor window. It displays settings for scheduled file output events, file format, image file path, and compression options. The 'Save Before Post Processing' option is checked.

7. Add another PNG Output Event and change the Image File name it AfterPost.
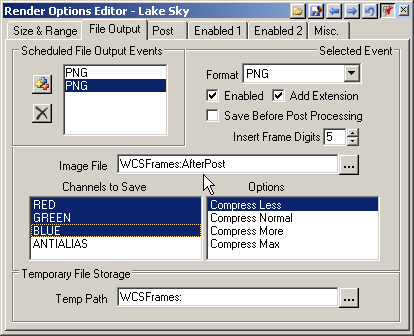
Screenshot of the Render Options Editor in a software application. Options include file format, save settings, channels to save, compression levels, and temporary file storage.

8. Go to the Post page and Add Post Process.
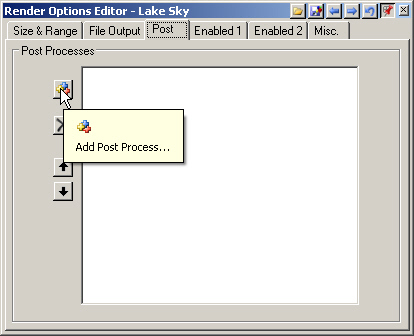
Screenshot of a software interface labeled "Render Options Editor - Lake Sky" showing a dropdown menu with the option to "Add Post Process…" selected.

9. Select the Cartoon item from the Post Process list in the Lake Sky popup window. Confirm the operation.
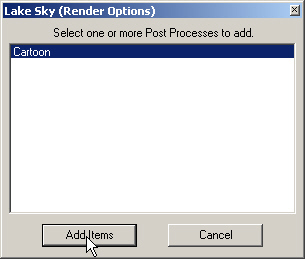
A dialog box titled "Lake Sky (Render Options)" with options to select post processes to add. The "Cartoon" option is displayed, and a cursor points to the "Add Items" button. "Cancel" button is also visible.

10. Open Render Control. Confirm the Camera, Options, and Save settings for the Lake Sky Render Job. Give the Render Job a Go.
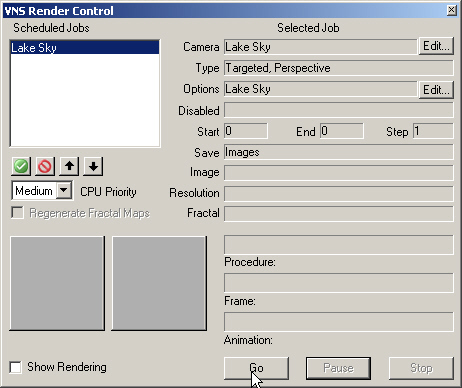
A screenshot of the VNS Render Control interface showing settings for a scheduled job named "Lake Sky" with options to edit the camera, type, and other parameters. Buttons for Go, Pause, and Stop are visible.

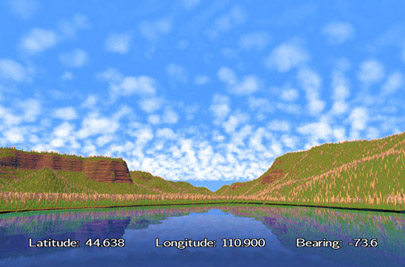
11. When VNS is finished rendering, click Show Rendering in the Render Control window to show the render with post processing.
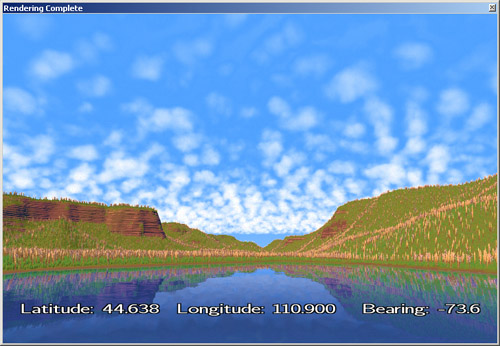
A computer-rendered landscape shows a reflective lake surrounded by grassy hills and a bright sky filled with scattered clouds. Text at the bottom indicates latitude 44.638, longitude 110.900, and bearing -73.6.

12. Go to the menu and View > View Image > From Disk. Open BeforePost00000.png. Even if you don’t do many effects, this method is handy for adding project information to renders.
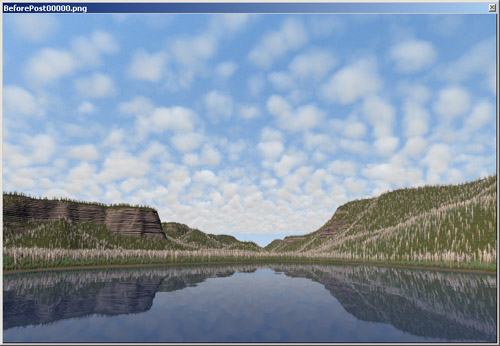
A serene lake reflecting a sky with scattered clouds, surrounded by tree-covered terrain and rocky hills, shown in a computer-generated image.
Scroll to top
Skip to content