Part 8B. Placing Ecosystems with Shapefile Objects
Getting Started with VNS 3: GIS Basics
Part 8A. Importing Shapefiles with Attributes
1. There are two ways to associate the imported Pine Burn vectors with the Pine Burn Ecosystem. One way is to copy each vector to the Ecosystem. This is called hard linking and we’ve done it in previous tutorials. It works great for a few vectors but is very tedious and inefficient for thousands of them. The second way to associate vectors to Ecosystems is to dynamically link them with a Search Query.
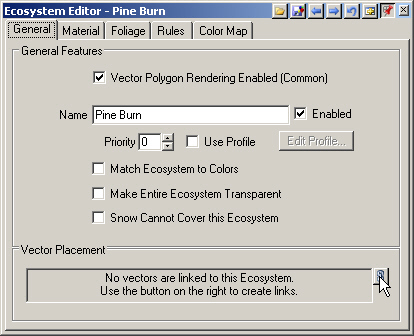
2. Go to the Land Cover Task Mode. Expand the Ecosystems category and open the Pine Burn Ecosystem. Go to the General page, Vector Placement section, and select Link Operations.
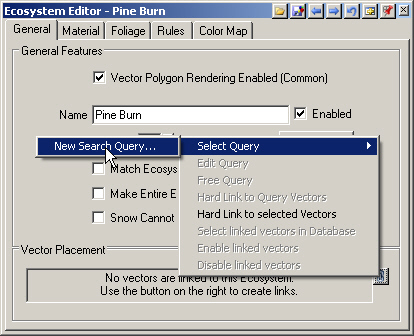
3. Select Query and New Search Query.
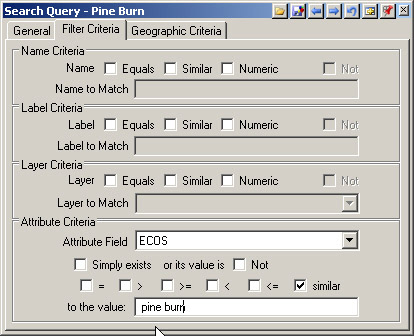
4. This will open the Search Query window, conveniently named Pine Burn. The default filter is set to search the appropriate database objects.
5. The Filter Criteria page sets the conditions for searching the selected database objects. We’re going to use the shapefile attribute for ecosystem type, ECOS, so select it from the Attribute Field dropdown list.
6. This is the Search Query for finding Pine Burn vectors, so make the ECOS Attribute value similar to pine burn. We could also use equal to (=) and type in all caps, but similar avoids problems caused by case issues in the original shapefile.
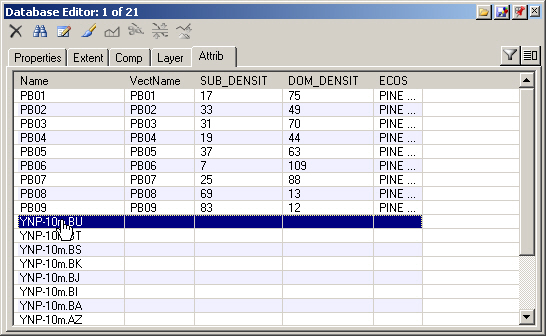
7. Go to the Database Editor. Select one of the DEMs to deselect the vectors.
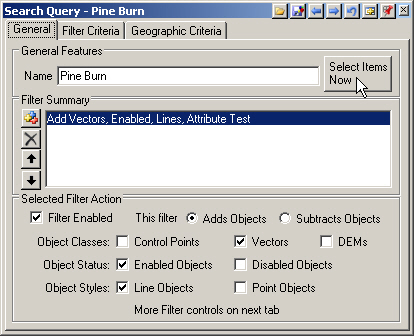
8. Go to the Search QueryGeneral page and Select Items Now to test the Search Query.
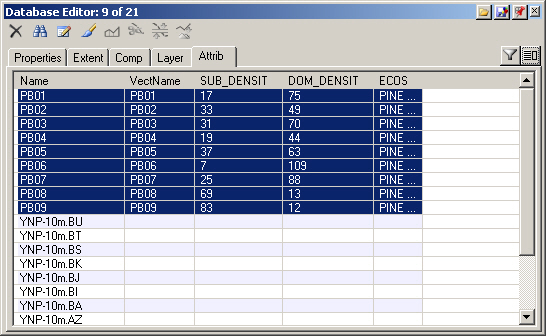
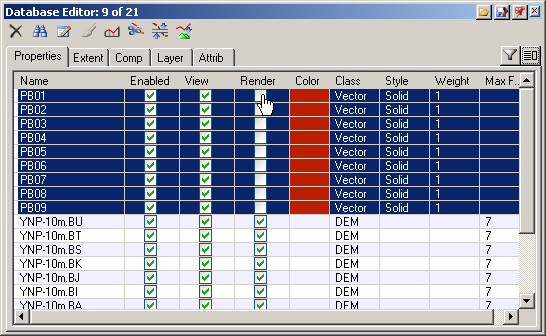
9. The 9 Pine Burn vectors will be selected in the Database Editor.
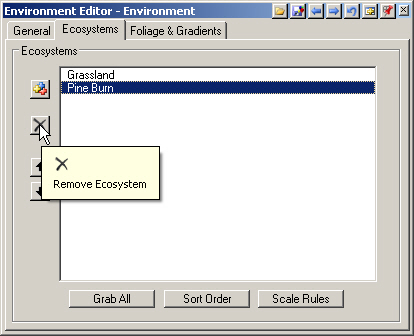
10. Open the Environment to the Ecosystems page and Remove the Pine Burn Ecosystem. This will restrict its rendering to vectors only. Confirm the operation.
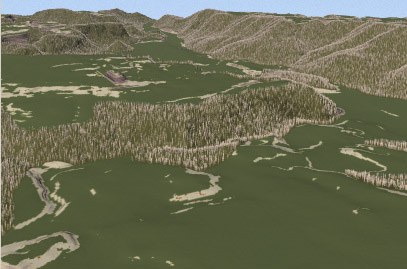
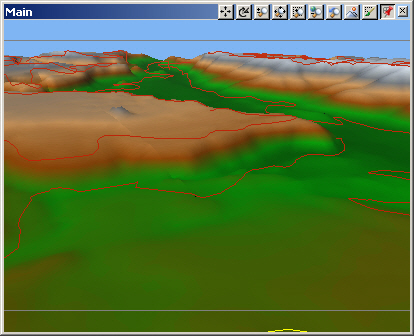
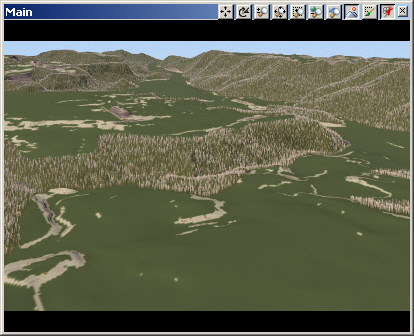
11. Save the project and render a Main preview. The Pine Burn Ecosystem rendered within all Pine Burn vectors.
12. We don’t need the rendered vectors in our view. Go the Database EditorProperties page and select the 9 PB vectors if they’re not still selected. Click a Render checkbox to deselect them all.
13. Save the project and render another preview.
14. The next thing we’ll do is use the species percentage attributes to drive the relative distributions of Ecotypes within the Pine Burn Ecosystem. This is where Thematic Maps come in. They map attribute values to Component values.
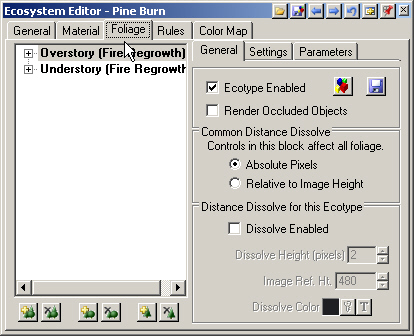
15. Bring up the Pine Burn Ecosystem Editor and turn to the Foliage page. The Overstory Ecotype will be the dominant foliage species and the Understory Ecotype will be the subdominant species.
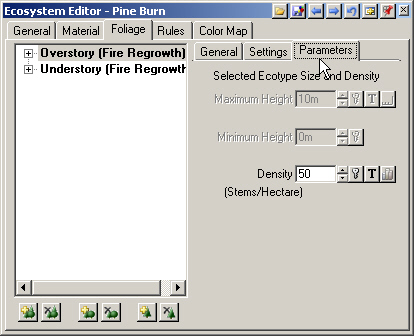
16. Select the Overstory Ecotype and turn to the Parameters page.
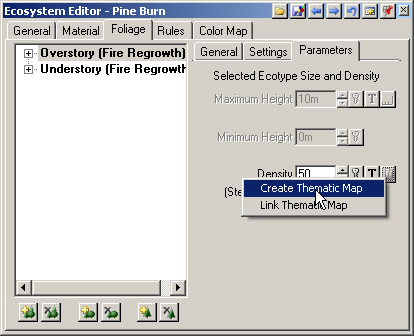
17. The Density is currently a static value. Select Thematic Operations and Create Thematic Map.
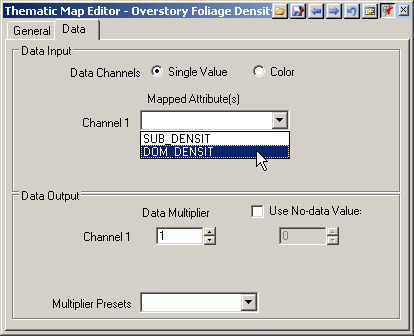
18. The Data page is where we assign the attribute to the map. This is the Overstory, so choose DOM_DENSIT from the Channel 1 dropdown list.
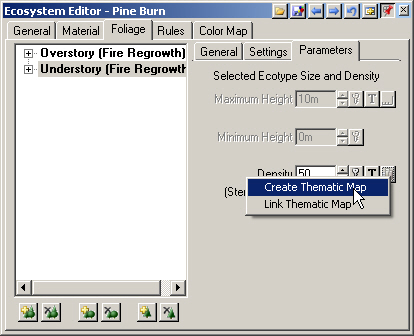
19. Back in the Ecosystem Editor, select the Understory Ecotype and turn to the Parameters page. Select Density Thematic Operations and Create Thematic Map.
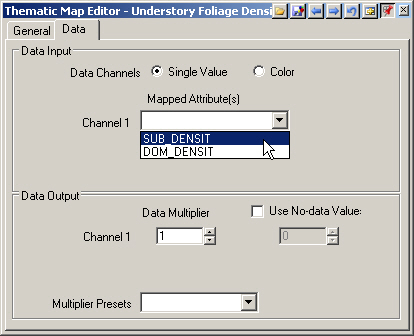
20. Go to the Data page. This is the Understory, so choose SUB_DENSIT from the Channel 1 dropdown list.
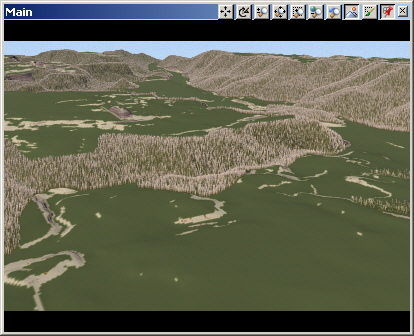
21. Open another Main view in the upper right quad. Save the project and render a preview. The foliage densities are different now because they’re using shapefile attributes applied with Thematic Maps.
22. To display vector attribute information in a render, right-click a forested area in the view. A new Point tab will appear in the lower Scene-at-a-Glance pane. Here you’ll see the vector name, Attributes, Layers, and Components for those pixels within a vector-bounded region.