3DNature

3D Landscape Design & Visualization Software published and supported by AlphaPixel

Menu

Scene Express 2 :: VRML

A digital rendering shows a semi-submerged futuristic structure in a body of water, set against a backdrop of a dense forest and rocky hills. Interface buttons are visible along the left and bottom edges.

Getting Started with Scene Express 2

Part 2. VRML Export

Viewing VRML files requires a VRML viewer.
Output from this tutorial is shown with Parallel Graphics’ Cortona.

Screen captures are from the VNS 3.
Scene Express for WCS 6 does not include VNS-specific features.

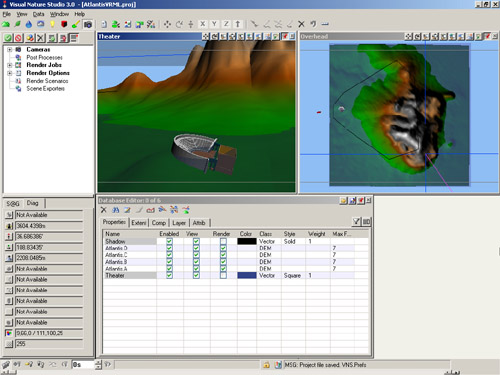
1. Open Atlantis project from the WCSProjects\SX folder on your hard drive. Save the project as AtlantisVRML.

A computer screen displaying a 3D modeling software interface with two 3D render windows on top and a properties table on the bottom.

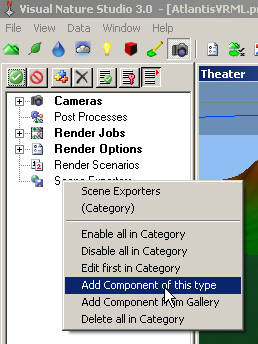
2. Go to the Render Task Mode in the Scene-at-a-Glance and add a Scene Exporter Component.

A screenshot of Visual Nature Studio 3.0 software showing a dropdown menu. The option "Add Component of this type" is highlighted and selected.

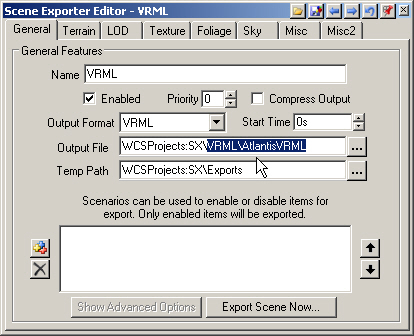
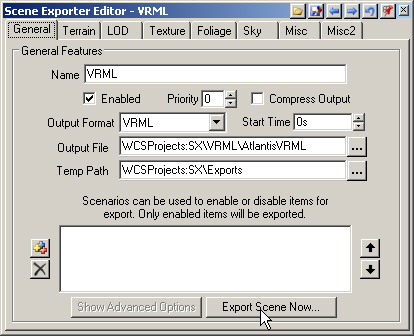
3. Name it VRML and change the Output Format to VRML. Replace Exports\AtlantisVRML at the end of the Output File target with VRML\AtlantisVRML. This will create a VRML folder in the SX project folder to hold the VRML files. Temporary files will be saved in an Exports folder.

Screenshot of the Scene Exporter Editor - VRML software interface showing options for naming, output format, start time, output file path, and temp path for exporting VRML scenarios.

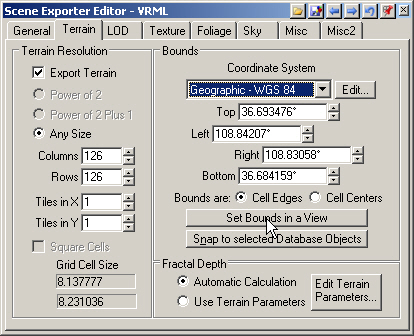
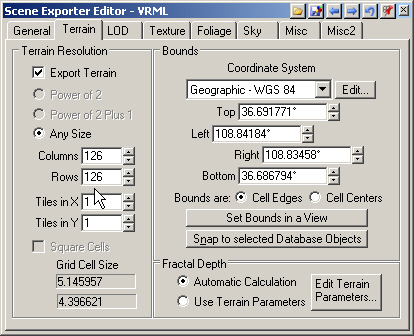
4. VNS Only. Go to the Terrain page. Choose Geographic – WGS 84 from the Coordinate System dropdown list.

Screenshot of a Scene Exporter Editor window with options for file name, output format, output file path, and temp path. Export settings include buttons for advanced options and exporting the scene.

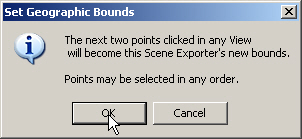
5. We’re creating a VRML file for realtime use so we’ll limit the size of exported terrain to speed VRML viewer response. Set Bounds in a View. VNS will remind you that the next two points clicked in any view will become the new bounds.

Screenshot of the Scene Exporter Editor - VRML tool, showing terrain resolution settings, coordinate system options, bounds configuration, grid cell size, fractal depth, and terrain parameters buttons.
Dialog box titled "Set Geographic Bounds" instructing to click two points for new bounds, with "OK" and "Cancel" buttons. A pointer is clicking on the "OK" button.

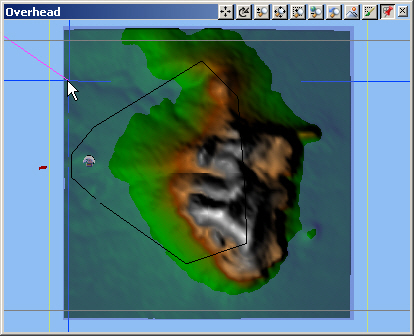
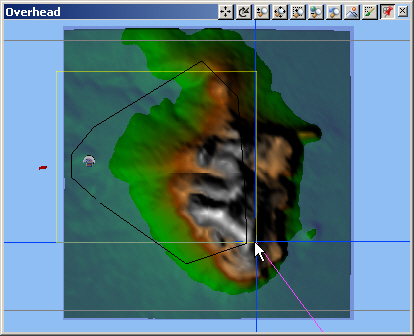
6. Left-click corners in the Overhead view near these locations.

A 3D modeling software interface displaying an overhead view of a terrain map with shaded relief, featuring elevation and contours. A cursor is visible on the left side of the screen.
Screenshot of a terrain editing software showing a topographical map with elevations in green, brown, and white gradients. A cursor is selecting a point on the map, and several tool icons are visible at the top.

7. The Editor will update with new Top, Left, Right, and Bottom bounds. The Terrain Resolution Columns and Rows values default to 126 x 126, which is the maximum for a ‘square’ tile. The VRML format limits the number of elevation values to 16,000 per tile. You can have more than 126 Columns or Rows but the other value will be reduced to meet total value limitations.

Screenshot of the Scene Exporter Editor - VRML software showing various settings including Terrain Resolution, Coordinate System, Cells Size, and Fractal Depth.

8. To export terrain at a higher resolution, increase the number of tiles. Change the Tiles in X and Tiles in Y values to 2.

A software interface of "Scene Exporter Editor - VRML" with settings for terrain resolution, grid cell size, coordinate system, and bounds. Multiple tabs are visible including "General," "Terrain," and "LOD.

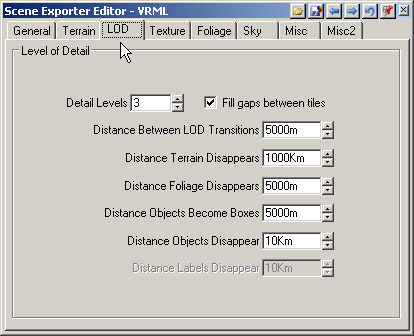
9. Go to the LOD page. Each Detail Level past 1 adds an additional copy of each DEM tile at half the resolution of the parent. For the output size of 126×126 per tile, a value of 3 creates 63×63 and 32×32 copies. With the default setting of 5000 meters for transitions, you’ll see the 126×126 tile if you’re within 5000 m of the tile center of mass and the 32×32 tile if you’re more than 15 Km away. We’ll stick with the defaults.

A software window titled "Scene Exporter Editor - VRML" showing settings for Level of Detail with options for adjusting distance and visibility of objects within 3D scenes.

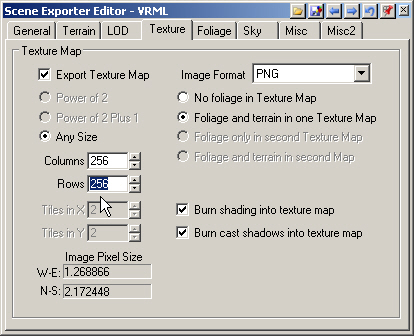
10. Turn to the Texture page. This controls the texture draped on the terrain. The Image Format field also applies to the sky texture. Increase the Columns and Rows to 256. These are the maximum values VRML viewers are required to handle but some can handle more. Scene Express allows up to 2048×2048. Consider your application and delivery method in choosing texture map size as higher resolution textures will result in larger texture files.

A screenshot of the Scene Exporter Editor for VRML. Options include texture map settings, image format, foliage, terrain settings, and columns/rows configurations.

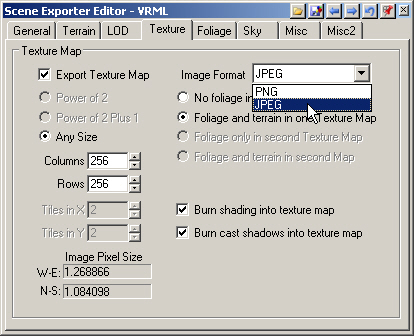
11. The PNG image format has an alpha channel for transparency control but can cause problems in some VRML viewers. To play it safe, choose JPEG as the Image Format.

A computer window titled "Scene Exporter Editor - VRML" with multiple tabs. The current tab is "Texture" and options for texture map settings, image format, and pixel sizes are shown.

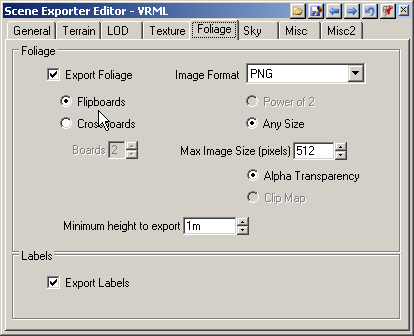
12. Go to the Foliage page. VRML accepts flipboard and crossboard foliage. Flipboards are 2-dimensional image objects and crossboards are 3-dimensional objects formed by two flipboards crossed at right angles. Crossboards will significantly slow realtime viewer interaction. Stay with the Flipboards option.

A settings window titled "Scene Exporter Editor - VRML" with options for exporting foliage and labels. Customizable settings include image format, max image size, transparency, and minimum height to export.

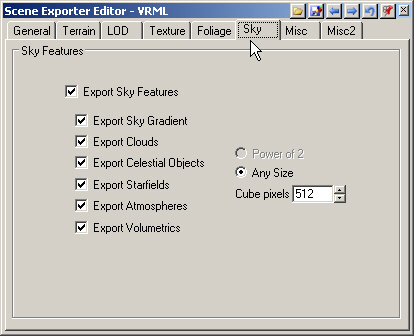
13. The Sky page defaults are good for snappy realtime interaction, so let’s leave them alone.

A screenshot of the Scene Exporter Editor - VRML software. The Sky tab is selected with various sky features checked, including sky gradient, clouds, celestial objects, starfields, atmospheres, and volumetrics.

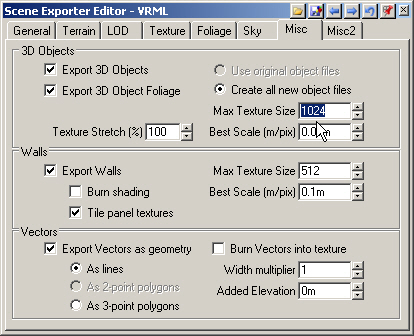
14. Go to the Misc page, 3D Objects section, and increase Max Texture Size to 1024. Keep in mind that a larger texture size will increase texture detail but will also increase file size.

Screenshot of the Scene Exporter Editor - VRML window displaying options for exporting 3D objects, walls, and vectors, with adjustable settings for texture size, scale, width, and elevation.

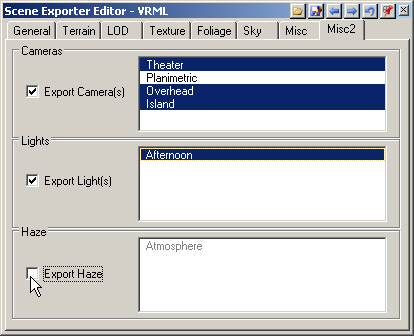
15. Go to the Misc2 page Cameras section and select the Theater, Overhead, and Island Camera. Select the Afternoon Light and deselect Export Haze.

Screenshot of the Scene Exporter Editor interface in VRML, showing options for exporting cameras (Theater, Planimetric, Overhead, Island), lights (Afternoon), and haze (Atmosphere).

16. Return to the General page and Export Scene Now.
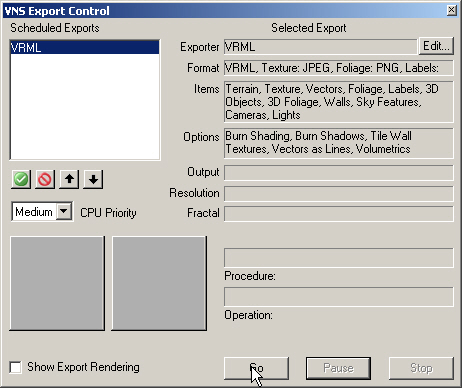
The Scene Exporter Editor window for VRML is open with various settings for output format, output file location, and temp path. There are options for enabling, disabling, and exporting scenes.

17. This will open the VNS Export Control window. Go to start exporting.

Screenshot of VNS Export Control dialog box, showing options for exporting formats including VRML, Texture, JPEG, Foliage, PNG, and more. Buttons for 'Go', 'Pause', and 'Stop' are at the bottom.

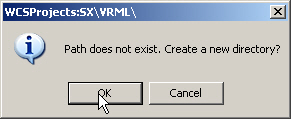
18. Confirm the creation of new directories in the SX project folder. You won’t get a WCSProjects:SX\Exports window if you’ve already done other Scene Express tutorials.

A dialog box with the message "Path does not exist. Create a new directory?" and options to select "OK" or "Cancel." The cursor is pointing to the "OK" button.

19. VNS Export Control will let you know when export is complete.

Screenshot of VNS Export Control software interface displaying export settings and progress bar. Options include export format, terrain, textures, and operation status showing "Export Completed.

20. If you don’t have a VRML viewer installed yet, install one; there are many to choose from. Output from this tutorial was viewed with Parallel Graphics’ Cortona using its DirectX renderer.

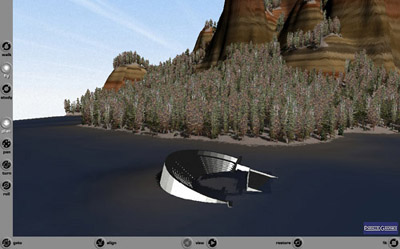
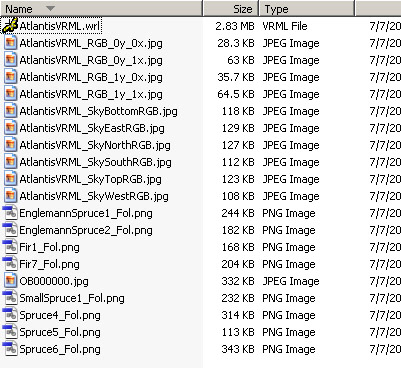
21. Go to your WCSProjects\SX\VRML folder and launch AtlantisVRML.wrl.

Screenshot of a file explorer window displaying a list of files with details like name, size, type, and date modified. Files include .wrl, .jpg, and .png formats with names related to AtlantisVRML and various foliage types.

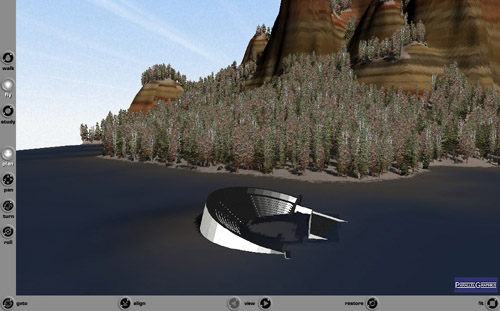
22. Here’s what the Theater viewpoint looks like in Cortona.

A virtual landscape showcasing a curved metallic structure partially submerged in water, surrounded by a dense forest with rocky cliffs in the background. A toolbar is visible on the left and bottom edges.

23. Exported files from this tutorial are in the WCSProjects\SX\Tutorial Output\VRML folder on the VNS 3 DVD. The completed project file is in the WCSProjects\SX\Tutorial Projects folder on your hard drive.

Produced by Scott Cherba for 3DNature

Scroll to top
Skip to content