3DNature

3D Landscape Design & Visualization Software published and supported by AlphaPixel

Menu

Scene Express 2 :: 3ds Max PRJ

A curved, concrete structure partially submerged in a body of water, set against a forested hillside with mountains in the background.
Getting Started with Scene Express 2

Part 3. 3ds Max PRJ Export

Screen captures are from the VNS 3.
Scene Express for WCS 6 does not include VNS-specific features.

1. Open the Atlantis project from the WCSProjects\SX folder on your hard drive. Save the project as Atlantis3ds.
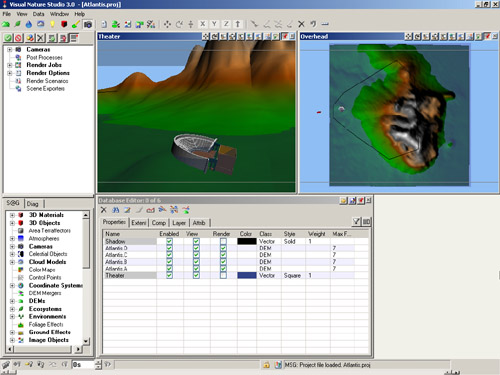
A computer screen displaying 3D modeling software with environment views, object manipulation tools, and a database editor.

2. Go to the Render Task Mode in the Scene-at-a-Glance and add a Scene Exporter Component.
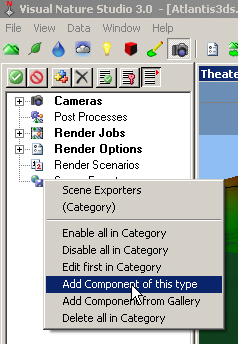
A screenshot of Visual Nature Studio 3.0 software. The menu shows options for adding a component, enabling/disabling all, and editing in the "Render Jobs" category.

3. Name it 3ds and change the Output Format to 3DS. Replace Exports\Atlantis3ds at the end of the Output File target with 3ds\Atlantis3ds. This will create a 3ds folder in the SX project folder to hold the Max files. Temporary files will be saved in an Exports folder.
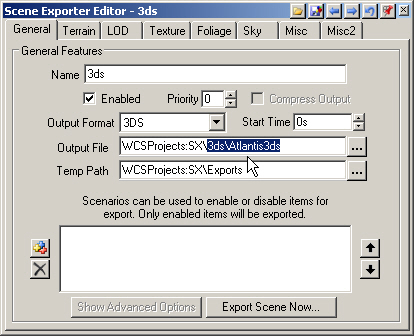
A screenshot of the Scene Exporter Editor - 3ds software interface displaying settings for exporting a scene. The output format is set to "3DS" with specified output and temp file paths.

4. VNS Only. Go to the Terrain page. Choose Geographic – WGS 84 from the Coordinate System dropdown list. The export bounds default to the terrain bounds.
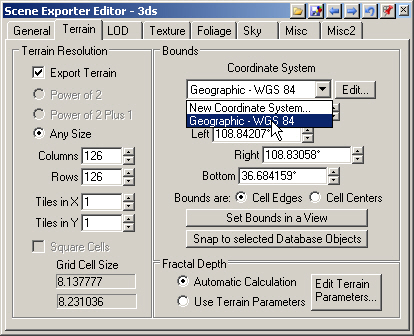
A software interface for "Scene Exporter Editor - 3ds" showing options for terrain resolution, coordinate system settings, and grid cell scale. A dropdown menu is open in the coordinate system section.

5. The 3ds format limits the number of vertices in a terrain tile. The largest columns=rows tile you can have is 181 x 181. If you increase one value, the other value will be reduced to meet the format criteria. We’ll export a ‘square’ tile so enter 181 in the Columns and Rows fields.
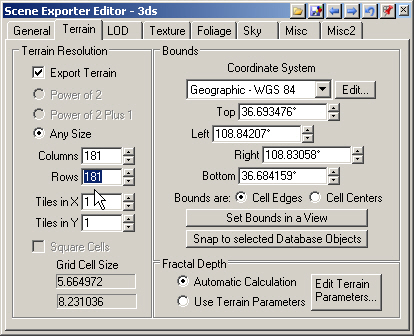
A software interface showing settings for exporting terrain. It includes options for terrain resolution, size in cells, geographic coordinates, and grid size, along with buttons for editing and selecting values.

6. To increase Grid Cell Size, change the Tiles in X and Tiles in Y values to 2.
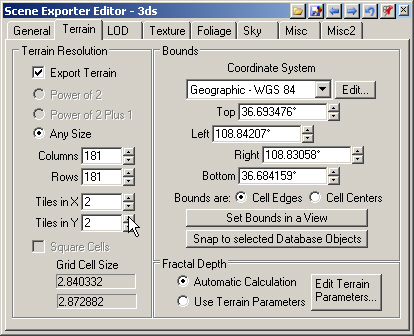
Screenshot of the Scene Exporter Editor window in a 3D software, showing various settings for terrain resolution, bounds, coordinate system, grid cell size, and fractal depth.

7. There are no LOD options in the 3ds format.
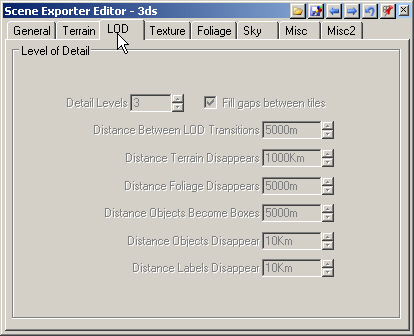
Scene Exporter Editor interface showing adjustable levels of detail settings including terrain and foliage distances, with a selected checkbox for filling gaps between tiles.

8. Turn to the Texture page. This controls the texture draped on the terrain. The Image Format field also applies to the sky texture. Increase the Columns and Rows to 512. This will give us a terrain texture where 1 image pixel is approximately 1 meter square.
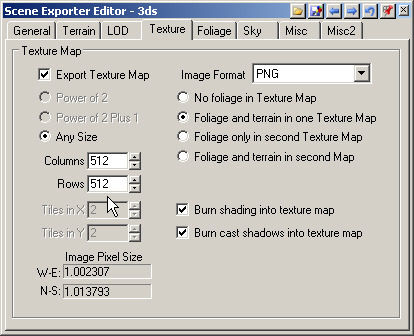
Screenshot of the Scene Exporter Editor settings for 3ds software. Options include texture map size, image format, and various foliage and terrain selections. Checkbox options for shading and shadows.

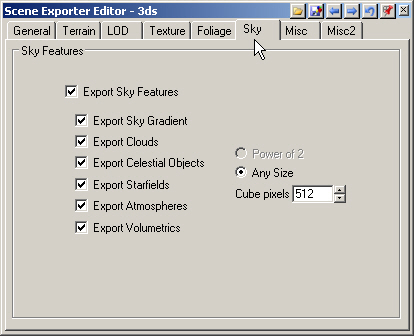
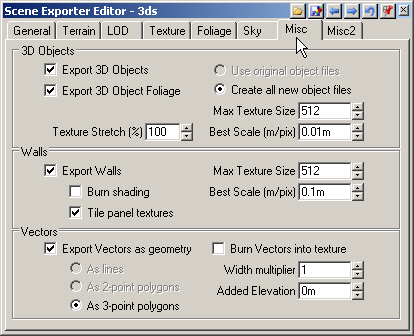
9. The Foliage, Sky, and Misc page defaults will work fine for this tutorial.
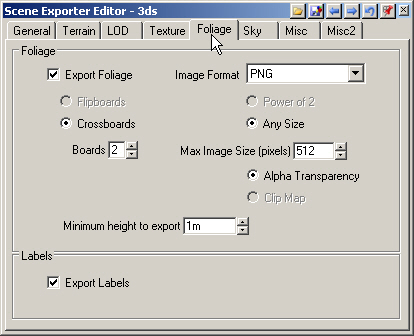
Screen capture of a Scene Exporter Editor interface with multiple tabs and options for exporting foliage and labels in PNG format, and settings for image size, alpha transparency, and exporting height.
A computer software interface named "Scene Exporter Editor - 3ds" displaying various options under the "Sky" tab, including export settings for gradients, clouds, celestial objects, and more.
A software interface labeled "Scene Exporter Editor - 3ds" with various check boxes and options for exporting 3D objects, walls, and vectors. Includes settings for texture size, best scale, and elevation.

10. Go to the Misc2 page Cameras section and select the Theater Camera. Select the Afternoon Light and deselect Export Haze.
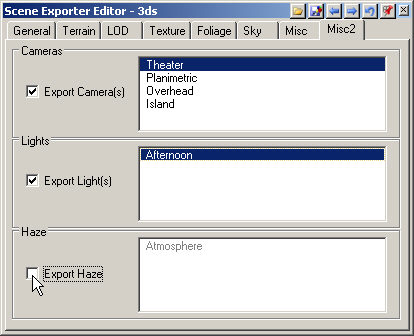
Screenshot of the Scene Exporter Editor in 3ds Max with options for exporting cameras, lights, and haze. Export settings for cameras show selected presets: Theater, Planimetric, Overhead, Island.

11. Return to the General page and Export Scene Now.
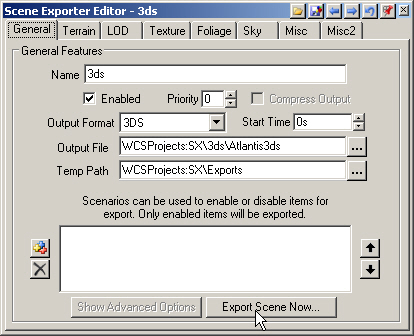
A screenshot of the Scene Exporter Editor - 3ds window. It shows various tabs and fields for configuring export settings, such as Output Format, Output File, Temp Path, and a button labeled "Export Scene Now".

12. This will open the VNS Export Control window. Go to start exporting.
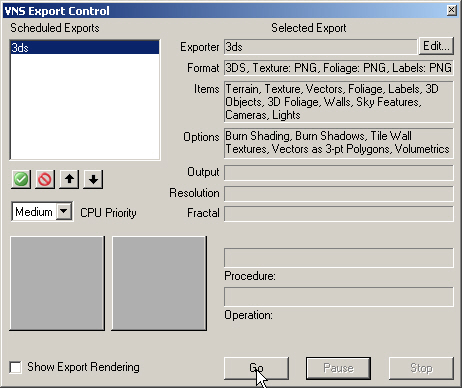
Screenshot of VNS Export Control panel showing settings for exporting 3ds files including format, options, output, resolution, and fractal inputs. A "Go" button is highlighted at the bottom.

13. Confirm the creation of new directories in the SX project folder. You won’t get a WCSProjects:SX\Exports window if you’ve already done other Scene Express tutorials.
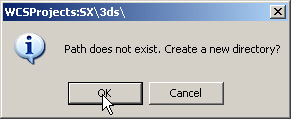
A dialog box states "Path does not exist. Create a new directory?" with options to click "OK" or "Cancel." A cursor points to the "OK" button.

14. VNS Export Control will let you know when the export is complete.
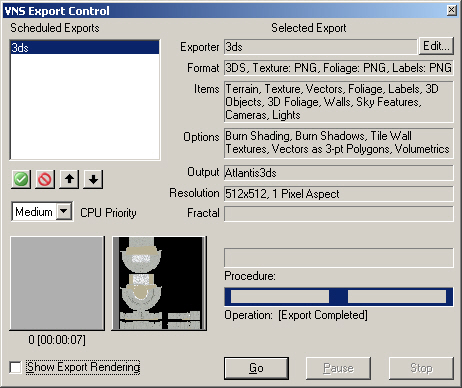
A software window labeled "VNS Export Control" with options to export in different formats, set parameters, and manage rendering. The interface includes various drop-down menus, buttons, and a progress bar.

15. Launch 3ds Max and import the Atlantis3ds.prj file from your WCSProjects\SX\3ds folder.
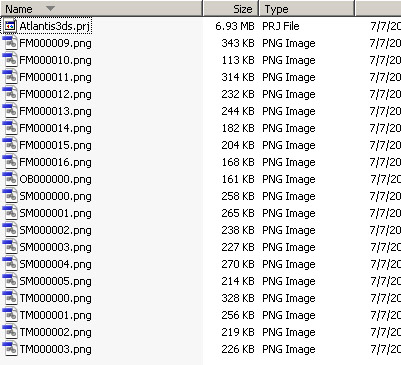
A file directory showing various .png images with file names FM000009.png to FM000032.png, sizes ranging from 113 KB to 344 KB, and type listed as PNG Image. There's also a file named Atlantis3ds.prj.

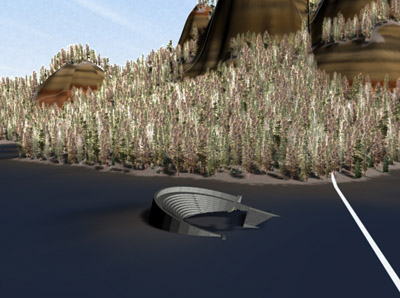
16. Here’s what the Theater camera view looks like in 3ds Max 2009. The prominent white line in the render is the seam between adjacent texture and/or DEM tiles. Another seam is faintly visible on the small hill at the left rear of the view. The data necessary to close this gap cannot be currently saved to the 3ds Max prj format.
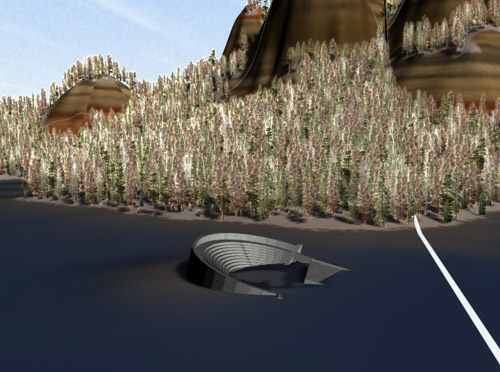
Aerial view of a curved dam structure with surrounding forested area and a mountain in the background.

17. Exported files from this tutorial are in the WCSProjects\SX\Tutorial Output\3ds folder on the VNS 3 DVD. The completed project file is in the WCSProjects\SX\Tutorial Projects folder on your hard drive.

Produced by Scott Cherba for 3DNature

Scroll to top
Skip to content