3DNature

3D Landscape Design & Visualization Software published and supported by AlphaPixel

Menu
Getting Started with VNS 3: Sky & Clouds

Part 9A. Fog

1. Open the SkyClouds project from the Tutorials\YNP projects folder. Save the project as SkyClouds9. We’ll start by adding morning fog to the valley.

A computer screen displaying Visual Nature Studio software with various modeling tools and settings, featuring a 3D terrain model and ecological simulation options.

2. Change to the Sky Task Mode. Right-click the Atmospheres category, and Add Component of this type.

A software interface for Visual Nature Studio 3.0 displaying a context menu with options for managing categories, including "Add Component of this type" highlighted in blue.

3. Name it Fog.

Screenshot of the "Fog" settings in the "Atmosphere Editor" window, showing options for volumetric clouds, general features, and ambient light reflection from the sky and ground.

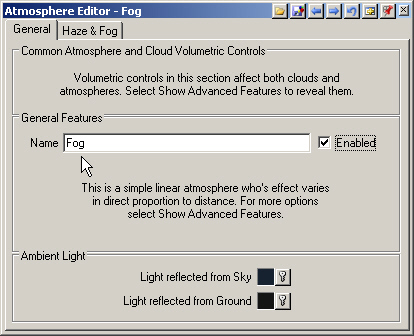
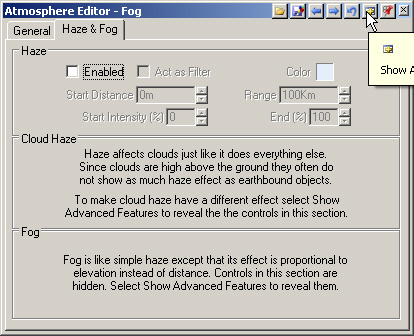
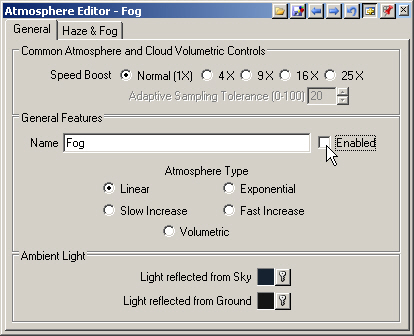
4. Go to the Haze & Fog page. Disable the Haze. The Fog feature is normally hidden so Show Advanced Features .

Screenshot of the Atmosphere Editor - Fog settings interface, showing options for enabling haze, setting haze parameters, and fog effects description. The interface includes various sliders and checkboxes.

5. Enable the Fog. The lake elevation is a little less than 2100 meters and the cabins are at about 2300 meters. To have the fog appear between the lake and cabin elevations, enter 2100 meters in the Low Elevation field and 2300 meters in the High field. Leave the Low Elevation Intensity at 100% to cover the valley floor in dense fog.

Screenshot of the Atmosphere Editor - Fog settings window, displaying options for Haze, Cloud Haze, and Fog, with adjustable parameters for distance, intensity, and elevation.

6. Save the project and render a Cabin Final preview.

A 3D-rendered aerial view of a foggy mountainous landscape with a rectangular, fenced area containing a winding pathway and small structures.

7. For a lighter fog showing the lake, enter a Low Elevation Intensity of 50%.

A screenshot of the Atmosphere Editor - Fog interface showing options for adjusting haze, cloud haze, and fog settings, including start distance, intensity, elevation, and color.

8. Render another preview.

A conceptual landscape design with a serpentine road leading to a lakeside cabin surrounded by dense forest, displayed in a computer simulation program.

9. We’re done with the fog so turn to the General page and disable it.

Screenshot of the Atmosphere Editor showing settings for "Fog" including speed boost options, atmosphere type, and light reflection parameters, with the "Enabled" checkbox checked.
Scroll to top
Skip to content