3DNature

3D Landscape Design & Visualization Software published and supported by AlphaPixel

Menu
Getting Started with VNS 3: Lakes & Streams

Part 6F. Streams

1. The stream will have foliage we’d like to see, so open the Lake View View Preferences. Turn to the Land Cover/Water page and enable Other Foliage to render Ecosystem foliage.
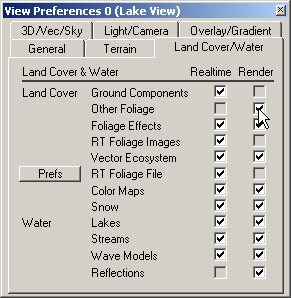
A software interface titled "View Preferences 0 (Lake View)" with tabs and checkboxes for Land Cover & Water settings under Realtime and Render categories. A cursor hovers over a checkbox.

2. That will include the Pine Burn Ecosystem, which we don’t need to render yet. Expand the Ecosystems category in the lower Scene-at-a-Glance and disable it.
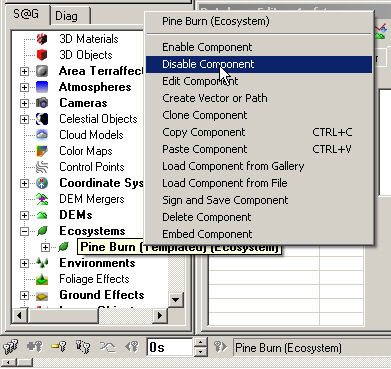
A software interface displaying a menu. The "Disable Component" option is highlighted, under the Ecosystems category, which shows various other components and folders on the left sidebar.

3. Go to the Water Task Mode and select the Streams category. Add Component from Gallery.
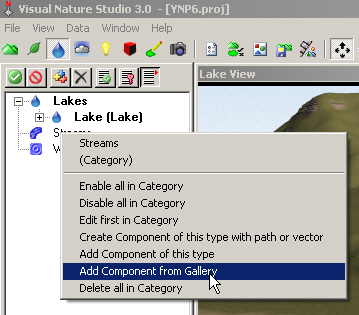
A software interface showing a menu with options related to lakes, including "Add Component from Gallery." The menu is part of "Visual Nature Studio 3.0" with various toolbar icons above.

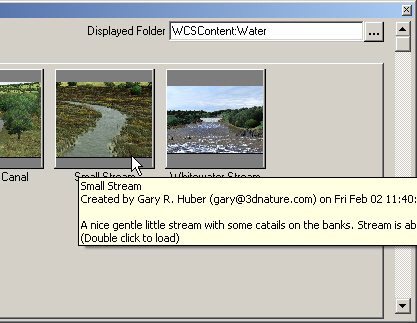
4. Load the Small Stream.

A computer screen showing the folder "WCSContent:Water" with image thumbnails. A mouse cursor hovers over "Small Stream," displaying information about the image created by Gary R. Huber on Fri Feb 02.

5. Find the Stream Vector in the lower Scene-at-a-Glance. Instead of clicking and dragging the vector, let’s connect it to the Stream in another way. Right-click the vector and Copy Component.
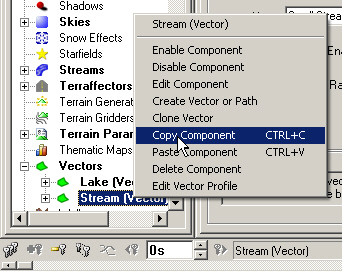
A software interface showing a context menu with options such as "Enable Component," "Disable Component," and "Copy Component" highlighted in blue. Other interface elements are visible in the background.

6. Expand the Streams category in the upper Scene-at-a-Glance. Select the Small Stream Component and Paste Component. Confirm the operation.
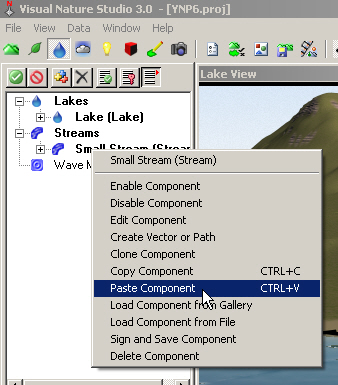
A screenshot of the Visual Nature Studio 3.0 software showing a dropdown menu with the "Paste Component" option highlighted. A project list and a landscape view are visible in the background.

7. Save the project and render a preview. The Pine Burn Ecosystem has been disabled so all we’re seeing is Ground Effect and Stream.
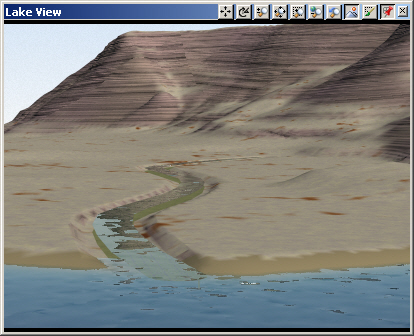
A digital rendering of a lake with a small stream flowing towards it, bordered by mountainous terrain in the background, viewed in a software interface.

8. The stream is not rendering in the entire width of the stream bed. While the Stream Terraffector radius is 15 meters, the Small Stream Component Effect Radius is only 6.7 meters.
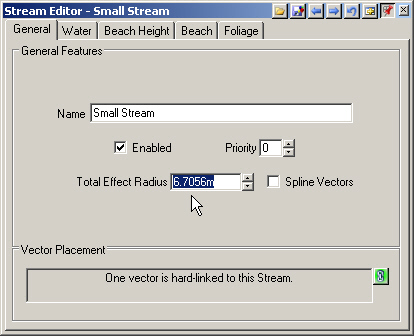
Screenshot of a Stream Editor tool interface with "Small Stream" selected. The total effect radius is set to 6.7056 meters, and there is a note indicating one vector is hard-linked to this stream.

9. Increase it to 16 meters and Spline Vectors.
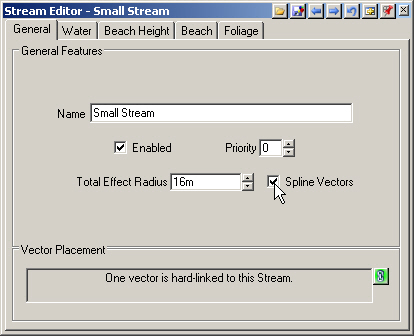
Screenshot of Stream Editor software interface displaying options for configuring general features of a stream including name, enabled status, priority, total effect radius, and spline vectors.

10. Save the project and render a preview.
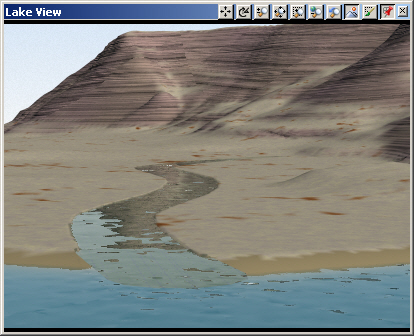
A digital rendering of a narrow, meandering stream flowing from a mountainous area into a body of water, displayed in a window labeled "Lake View".

11. The Small Stream elevation is too high where it enters the Lake. According to the Diagnostic Data, the Stream elevation is about 2065.3 meters at the confluence relative to the Lake‘s is 2063. That makes the stream about 2.3 meters too high.

12. Go to the Water page Depth tab and decrease the Water Depth from -0.3 to -2.6 meters.
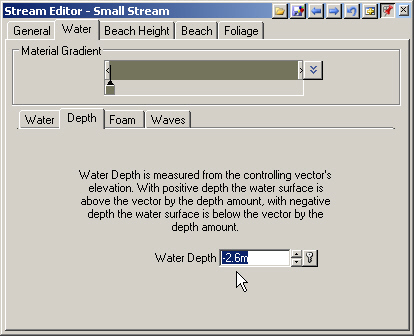
Screenshot of the Stream Editor interface on the Small Stream tab, showing a Material Gradient section and a Water Depth setting at 2.6 meters with adjustable parameters.

13. Save the project and render a preview.
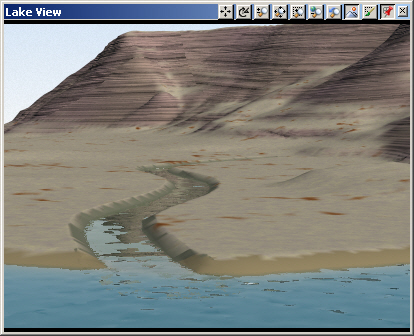
A computer-generated landscape showing a meandering river flowing from mountains in the background towards a body of water in the foreground, with a toolbar visible at the top of the image.

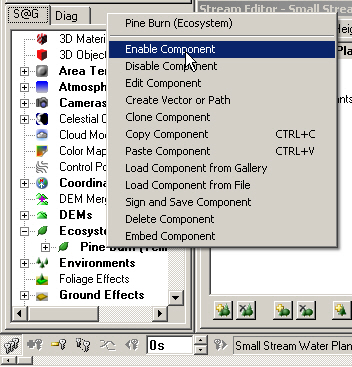
14. Enable the Pine Burn Ecosystem.

A drop-down menu titled "Pine Burn (Ecosystem)" with "Enable Component" highlighted is shown in a computer program interface. Various options for component interaction are listed in the menu.

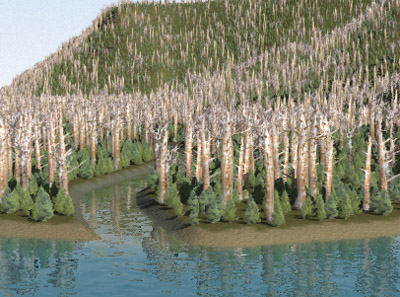
15. Let’s see how the Lake View renders with trees. Save the project and render a preview.
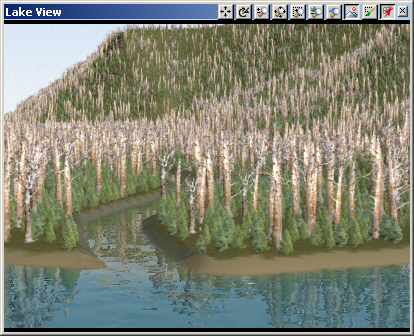
Computer simulation of a lake view featuring a forest with tall, thin trees and a reflective water body. The image is displayed with software interface elements visible at the top.
Scroll to top
Skip to content