Getting Started with VNS 3: Draping Images on Terrain
Part 4B. Camera Flight Path
1. Switch the Main view back to realtime mode.
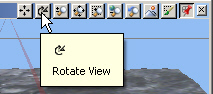
2. It’s time to rotate the Main Camera. We’ve already used the Rotate View on the titlebar so let’s use a different method.
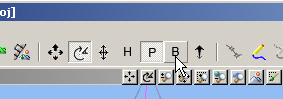
3. Activate the Main view and hold the space bar down to manipulate the camera. Select Rotate Mode on the toolbar. You will stay in manipulate camera mode as long as the space bar is depressed. By default, Heading , Pitch , and Bank are enabled. We just want to pitch the camera down. Disable Heading and Bank to keep from accidentally rotating the camera in those directions.
4. Pitch the camera view down to see just terrain. With the space bar still depressed, enable the Heading and Bank to make them available next time you need to manipulate an object. Release the space bar and exit Rotate Mode.
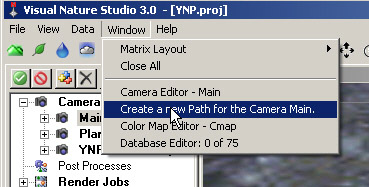
5. Go to the Render Task Mode. Select the Main Camera and Create to digitize a camera path.
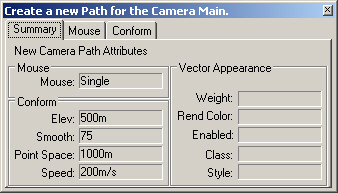
6. The Create window will confirm that we are creating a new path for the camera Main.
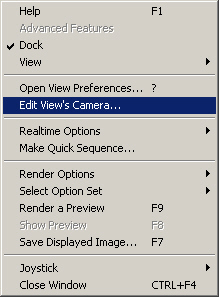
7. To watch the Camera Editor while we’re digitizing the path, open the Main view popup menu and select Edit View’s Camera.
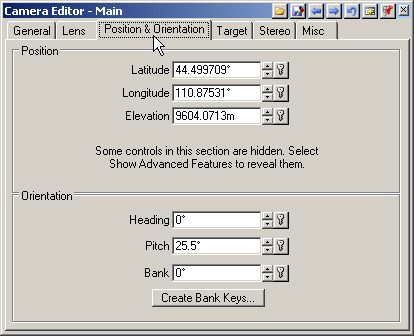
8. Go to the Position & Orientation page.
9. We can retrieve the Create window, and any hidden window, by going to the Window menu and selecting the window we’re looking for.
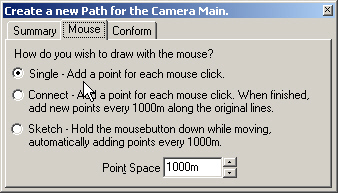
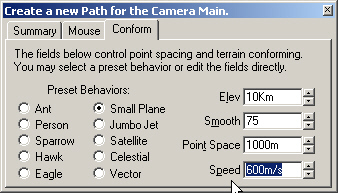
10. The Create window settings depend on the type of vector being digitized. On the Mouse page, we’re set to draw in the Single mode, with one point for each mouse click.
11. The Conform page defaults to Small Plane, with its own Elevation, Smoothing, Point Space and Speed settings. Increase the Elevation to 10 kilometers and the Speed to 600 m/s.
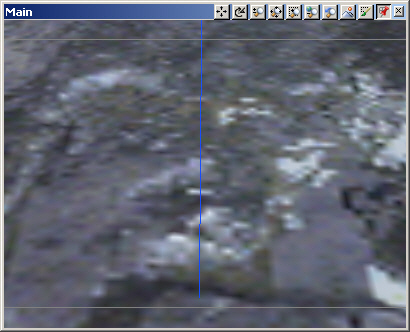
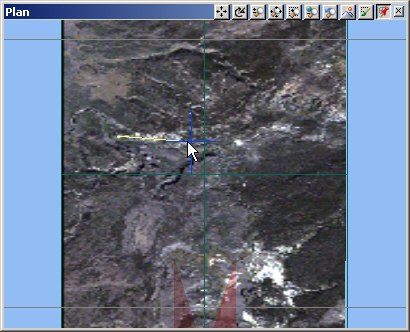
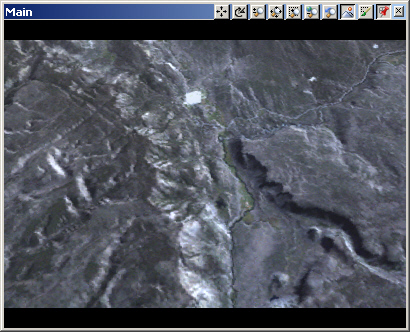
12. Left-click a starting point at the west end of this snowy cliff, left-click again at the east end, and right-click to finish.
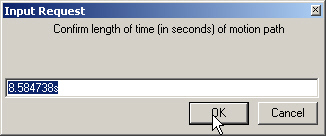
13. The Input Request window pops up with the time of the flight path based on the Create parameters. Confirm the length and save the project.
14. Play the animation. The Main Camera is targeted so it keeps looking at its stationary target as it moves along its path.
15. Stop the animation and return to frame 0.
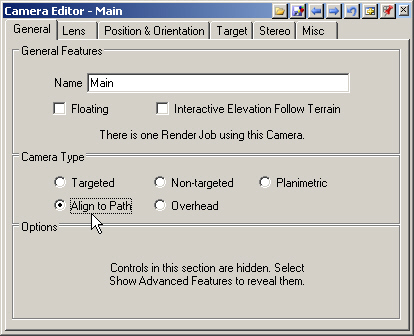
16. Go to the Camera Editor General page. Change the Camera Type to Align to Path.
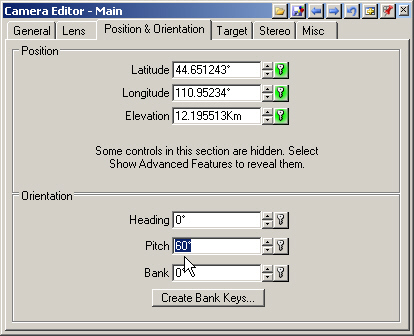
17. Play the animation. The Main Camera is now aligned to its flight path but the pitch is a little off.
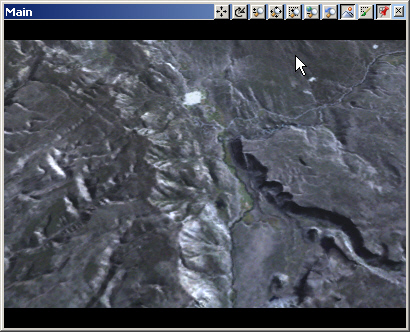
18. Stop playing the animation and return to the beginning. Go to the Camera EditorPosition & Orientation page and change the Pitch it to 60°. Play the animation.
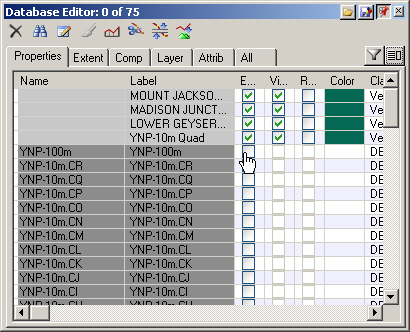
19. Save the project and render a Main preview. As it renders you can see the coarseness of the 100-meter terrain data.
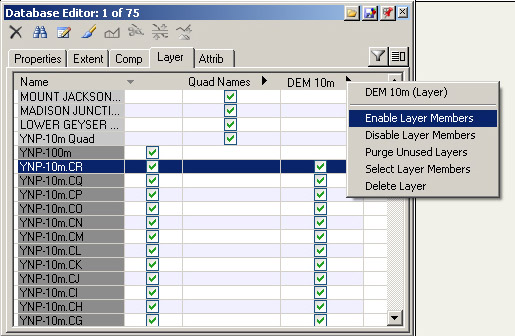
20. Go to the Database Editor and disable the YNP-100m DEM.
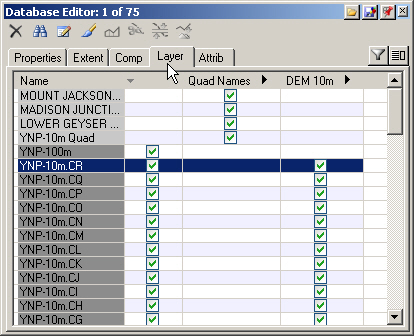
21. Select one of the YNP-10m tiles and turn to the Layer page.
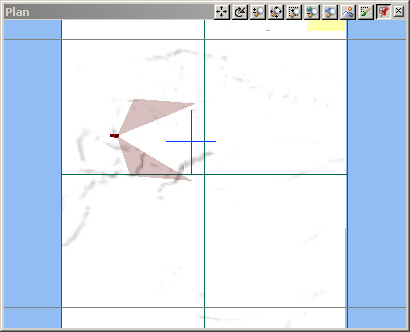
22. Click the DEM10m column label and Enable Layer Members.
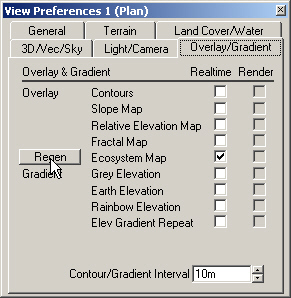
23. The Plan view terrain will turn white because the overlay image is now out of date.
24. Open the View Preferences to the Overlay/Gradient page. Regenerate the Ecosystem Map. It will take longer to generate the texture map because the terrain resolution is higher. When the overlay appears, you’ll notice that it is much sharper.
25. Save the project and render a Main Camera preview.
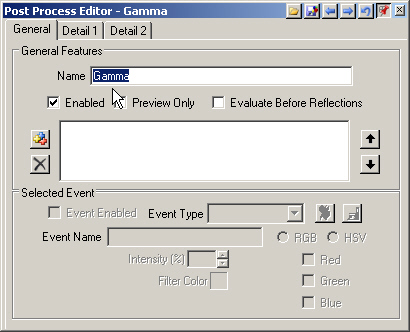
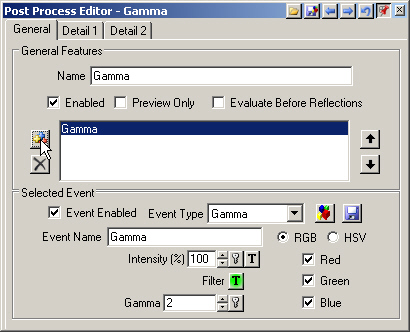
26. The 10-meter DEMs required more time to render than the 100-meter DEM, but they give us much more detailed terrain. The drape is a little dark, so let’s lighten the rendered view. Go to the Scene-at-a-Glance. Double-click the Post Processes to create a new one and rename it Gamma.
27. Add Post Process Event . The default is Gamma which is what we want. Gamma will lighten the render overall without bleaching the highlights.
28. Reduce the Gamma value to 1.3.
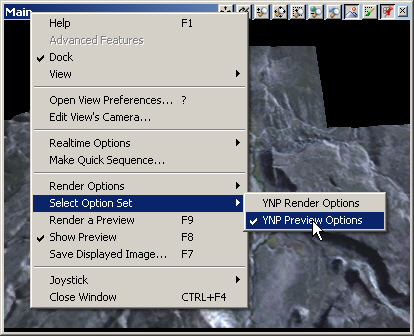
29. Open the Main Camera popup menu and Select Option Set. Note that it’s using the YNP Preview Options.
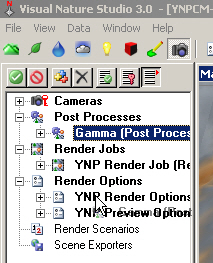
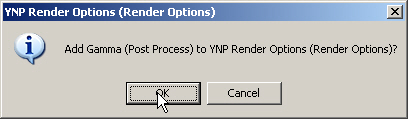
30. Expand the Render Options in the Scene-at-a-Glance. Click, drag, and drop the Gamma Post Process on the YNP Render Options.
31. Confirm the operation.
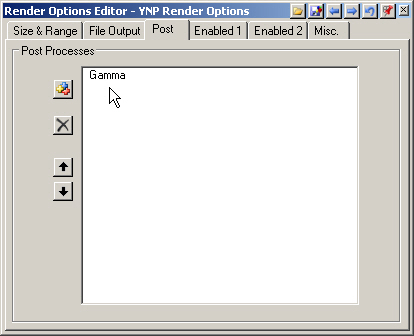
32. Open the YNP Render Options Editor to its Post page and you’ll see Gamma listed.
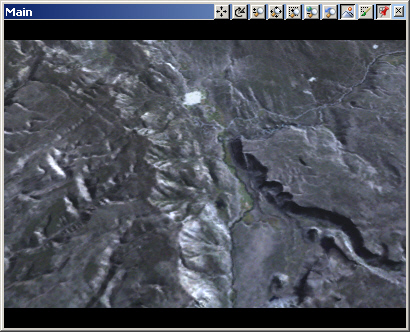
33. Open another Main Camera view in the Plan Camera window for comparison. Open its View Preferences, Select Option Set, and choose YNP Render Options. Save the project and render a preview. Note that the view is generally lighter and we still have detail in the highlights.
Main camera view with Gamma Post Process
Main camera view without Gamma Post Process
34. The rendered animation is on the VNS 3 DVD in the animation folder and named YNPCM.mov.