3DNature

3D Landscape Design & Visualization Software published and supported by AlphaPixel

Menu

Part 2C. Changing Keyframes

Part 2A. Animating the Camera
Getting Started with VNS 3: Animation Basics

Part 2C. Changing Keyframes

1. What if we want the 20 second animation to cover 10 seconds? That’s where Scale Key Frames comes in. One place to access it is from the Animation Toolbar, to the left of the Timeline button.

A computer interface shows a cursor pointing at an icon with a tooltip labeled "Scale Key Frames." The surrounding UI elements include icons, a timeline indicator, and the label "Main Camera.

2. Since Main Camera Longitude is still active and we’re in Group mode, the Scale Key Frames window opens up ready to scale the camera position group.
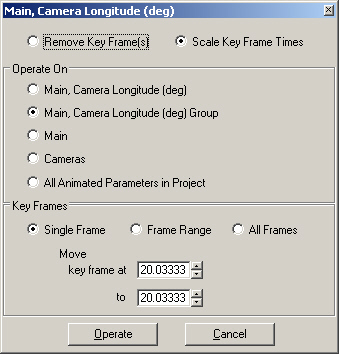
A software dialog box for adjusting camera longitude settings, including options for scale key frame times, removal of key frames, operate on, and setting key frames with various parameters.

3. In the Key Frames section, scale All Frames to the range from 0 to 10 seconds. Operate to scale the frames.
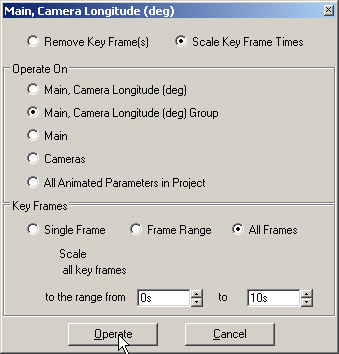
A software interface showing options to adjust camera longitude in degrees, with choices for key frames, frame range, or all frames. The mouse cursor hovers over the "Operate" button.

4. If we go back to time 0 by entering it into the frame counter, go to the Next keyframe now jumps to 10 seconds, not 20.

Screengrab of bottom toolbar with animation controls

5. Let’s access Scale Keyframes from the Camera Editor this time. Select Animation Operations beside any of the position parameters in the Main Camera Editor and select Scale Keyframe(s).
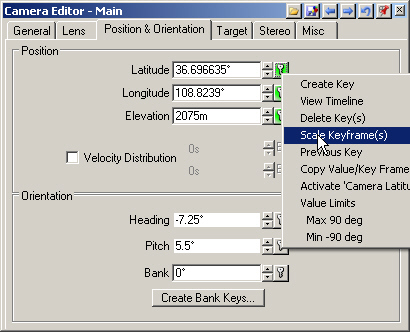
A screenshot of a Camera Editor software interface shows options for adjusting latitude, longitude, elevation, and orientation. A dropdown menu displays options such as "Scale Keyframe(s)" and "Create Key".

6. To scale the animation back to 20 seconds, choose All Frames, enter an upper range value of 20 seconds, and Operate.
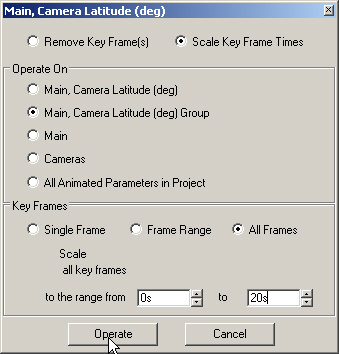
A software interface window features options for operating on camera latitude parameters and key frames settings. Buttons for "Operate" and "Cancel" are at the bottom.

7. Return to time 0, jump to the next keyframe at 20 seconds, and you’ll see that we’re back where we started.

8. Let’s change the camera path midway through the animation. Enter 10 into the frame counter and Enter to jump to 10 seconds.

Screengrab of bottom toolbar with animation controls

9. Select one of the Main camera position parameters in the Scene-at-a-Glance to activate the camera, if it isn’t already active.

10. Enable Move Mode on the Icon Toolbar and drag the camera south of its current position in the Island Planimetric view.
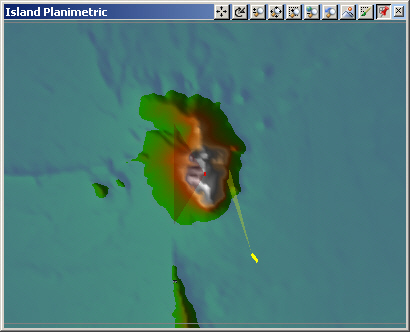
A computer-generated, planimetric map showing an island in varying shades of green and brown, indicating elevation changes. The image title "Island Planimetric" appears in the top left corner.

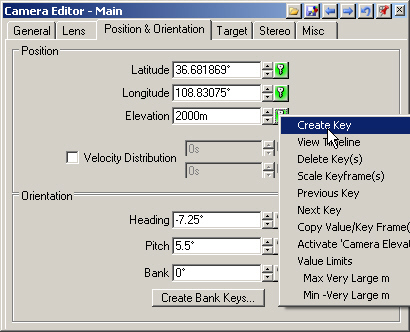
11. Go to the Camera Editor and drop the elevation to 2000 meters.
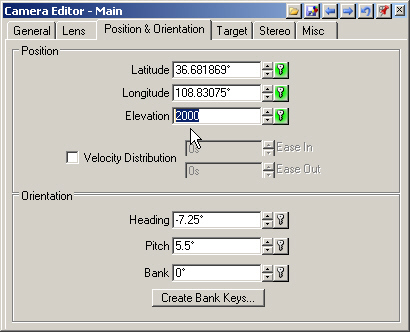
Camera Editor window showing position and orientation settings. Latitude is 36.681869°, longitude is 108.83075°, and elevation is 2000. Orientation includes heading, pitch, and bank angles.

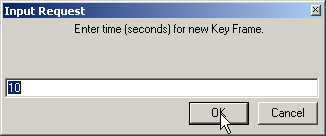
12. Create a key.

A camera editor interface showing position settings with latitude, longitude, elevation, and orientation fields. A context menu is open beside "Create Key" with various options like "View Tagline" and "Delete Key(s)".
A dialog box titled "Input Request" asks the user to enter a time in seconds for a new key frame. The input field shows "10", and a cursor is hovering over the "OK" button.

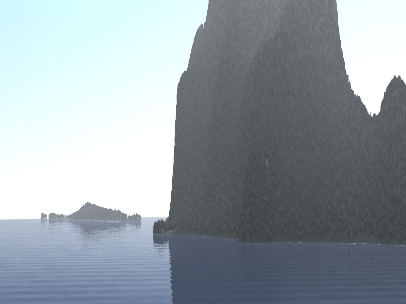
13. Save the project, go back to time 0, and play the animation. It looks like we dropped the elevation too much because we’re flying through the foreground ridge. You can use the forward and back arrow key on the keyboard to “scrub” through the animation one frame at a time.
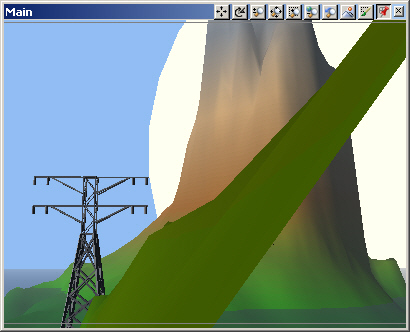
A 3D-rendered image showing a mountain, a high-voltage power line tower, and a large green object in the foreground.

14. That keyframe turned out to be a bad idea. Select Animation Operations and Delete Key(s).
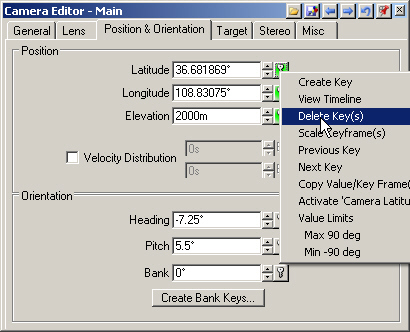
Screenshot of a "Camera Editor" window displaying settings for position and orientation, including latitude, longitude, elevation, heading, pitch, and bank. Context menu with "Delete Key(s)" option is shown.

15. We’re in Key Frame Group mode, so it defaults to operate on the Main Camera Group, which is what we want. We’re going to Remove Key Frame for the Main Camera Latitude (deg) Group, operating on a Single Frame at 10 seconds. Operate. This will return us to the original camera path with keyframes at 0 and 20 seconds. Save the project.
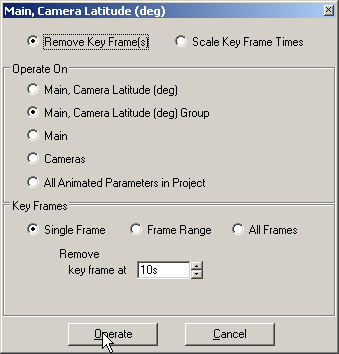
A software dialog box displaying options to remove key frames for camera latitude, including operation and key frame settings, with "Operate" and "Cancel" buttons at the bottom.
Scroll to top
Skip to content