3DNature

3D Landscape Design & Visualization Software published and supported by AlphaPixel

Menu
Getting Started with VNS 3: Getting Started

Part 1A. Importing Data

1. Welcome to 3DNature‘s GIS visualization tool, Visual Nature Studio. When you launch VNS the opening splash screen will give way to a Startup Window where you can check Tips, Projects, and Tutorials.

2. Existing Projects provides information about projects in your projects folder.

3. New Projects allows you to generate a new project from basic Components. The Users page is for working with multiple users and Templates. We’ll look at those in Part 6.

4. Tutorials opens a list of Available Tutorials, each with a description and project thumbnail. Double-click the tutorial description or single-click the thumbnail to open it in your internet browser. The Resume button in the lower left corner opens the last project you were working on.

5. To create a new project, go to the menu and select File > New.

6. This will open the New Project window. In the New Project field, enter the project name, Island. All the projects demonstrated in these tutorials can be found on your hard drive in the WCSProjects\Tutorials folder. Create & Save to save the new project.

7. When the Import Data question box appears, answer Yes.

8. The terrain data we’re importing is on the VNS 3 DVD in the dem folder. Here you’ll find the island.elev file, which is a WCS/VNS terrain elevation file.

9. Open the file to launch the Import Wizard, which will correctly identify it as a WCS/VNS DEM. A DEM is a Digital Elevation Model. This is a generic term applied to most terrain data files.

10. To find out what other file types you can import, select File format reference or use the universal F1 Help key to jump to the appropriate section of the Interactive Reference Manual. For data types, scroll down the page to the DEM Formats section.

11. Meanwhile, back in VNS, the Import Wizard is still waiting for us. Proceed the the Next window.

12. The LOAD AS page allows us to choose the type of VNS object loaded. We’re importing a DEM so we’ll go with the Wizard’s loading suggestion and continue to the Next window.

13. We can change the file format, name and location on the OUTPUT FILE TYPE AND NAME page. The defaults are fine so continue to the Next window.

14. The Import Wizard selects a Coordinate System based on data read from the imported file. This file is in the Geographic – WGS 84 system.

15. We don’t need to make any DATA POSITIONING changes, so Import the data and make the new Coordinate System the default for viewing and rendering.

16. As the data is imported, progress updates will flash in the Status window at the right end of the Animation Toolbar. The Import Wizard will close once data import is complete.

17. After the data loaded, some of the categories in the Scene-at-a-Glance changed to a bold font. The Scene-at-a-Glance is divided into an upper and lower pane. It gives you convenient access to all Components, the building blocks of your scene. With each new project, basic default Components are created, represented by bold categories in the Scene-at-a-Glance. We’ll look more at the Scene-at-a-Glance when we work with Task Modes later on.

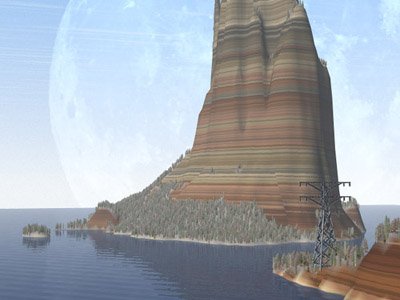
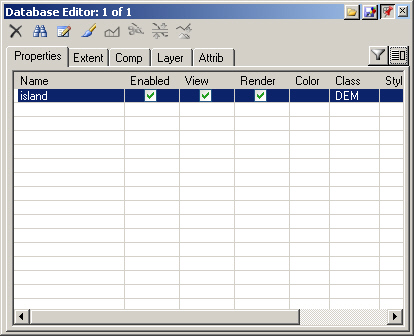
18. So where’s the terrain we just imported? Open the Database Editor Database.giffrom the icon toolbar or with the Alt+d keyboard shortcut. The island DEM is enabled and set to view and render.

19. The Matrix, the light area taking up most of the screen, is empty until we tell VNS what to put in it. By default, the Matrix is divided into 4 quadrants for Camera views and Component Editors.

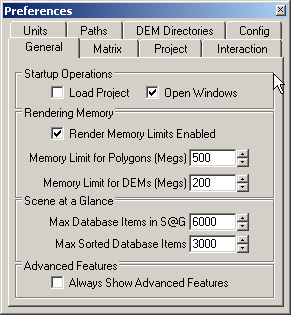
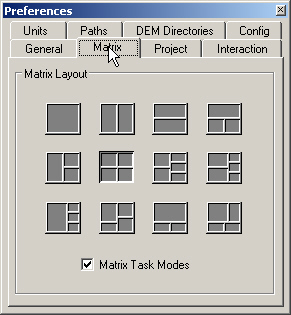
20. To change the Matrix layout, open Preferences Prefs.giffrom the Icon Toolbar.

21. The Matrix page allows us to choose one of 12 layouts. We’ll stay with the current 4-quad arrangement.

22. While we’re here, let’s look at the Paths page. When you see WCSProjects:, WCSContent:, and WCSFrames: elsewhere in the program, these are path aliases. Master Paths are the actual folder locations. Read more about them in the Interactive Reference Manual; they come in handy when you’re running VNS across a network.

23. The Units page gives you access to all unit settings so you can change them according to project requirements.

Scroll to top