3DNature

3D Landscape Design & Visualization Software published and supported by AlphaPixel

Menu

Scene Express 2 :: VTP

Getting Started with Scene Express 2

Part 4. Virtual Terrain Project (VTP) Export

The VTP format uses the Enviro viewer.
For more information visit the Virtual Terrain Project site.

Screen captures are from the VNS 3.
Scene Express for WCS 6 does not include VNS-specific features.

1. Open the Atlantis project from the WCSProjects\SX folder on your hard drive. Save the project as AtlantisVTP.

2. Go to the Render Task Mode in the Scene-at-a-Glance and add a Scene Exporter Component.

3. Name it VTP and change the Output Format to VTP. Replace Exports\AtlantisVTP in the Output File target with VTP\AtlantisVTP. This will create a VTP folder in the SX project folder to hold the VTP files. Temporary files will be saved in an Exports folder.

4. VNS Only. Go to the Terrain page. Choose Geographic – WGS 84 from the Coordinate System dropdown list.

5. We’re creating a VTP file for realtime use so let’s limit the size of exported terrain to speed VTP viewer response. Set Bounds in a View. VNS will remind you that the next two points clicked in any view will become the new bounds.

6. Left-click corners in the Overhead view near these locations.

7. The editor will update with new Top, Left, Right, and Bottom bounds. The VTP format is limited to a single terrain tile with a power of 2 plus 1 columns and rows. Use the Size increase widget to change it to 257. That will give us a Grid Cell Size of about 2 meters.

8. The VTP format uses CLOD (Continuous Level of Detail) so most of the LOD (Level of Detail) page parameters aren’t available.

9. Turn to the Texture page. This controls the texture draped on the terrain. The Image Format field also applies to the sky texture. Increase the Columns and Rows to 512. This will give us a terrain texture resolution of about 1 meter per image pixel.

10. The Foliage and Sky page defaults will serve us nicely so leave them alone. On the Misc page, select Create all new object files.

11. Go to the Misc2 page Cameras section and select the Theater Camera. Select the Afternoon Light and deselect Export Haze.

12. Return to the General page and Export Scene Now.

13. This will open the VNS Export Control window. Go to start exporting.

14. VNS will ask you to confirm the creation of new directories in the SX project folder. If you’ve already done other Scene Express tutorials you won’t get the WCSProjects:SX\Exports window.

15. VNS Export Control will let you know when export is complete.

16. Your WCSProjects\SX\VTP folder contains all the data files the VTP Enviro viewer needs.

17. For Enviro to find the files, they must reside in a Data folder within a folder that also contains the Enviro Apps folder. For more information, visit the Virtual Terrain Project site. Find the Data folder created by the VTP installer and copy your exported VTP files to it.

18. Launch VTP Enviro. Select Terrain and chose AtlantisVTP from the dropdown list.

19. Edit Properties.

20. The Camera page lets us change the navigation speed, among other things. Navigation instructions that follow are for the Panoramic Flyer. A navigation speed of 5 meters/frame is a good place to start with this terrain area and level of detail.

21. The original project Light is 2 PM on April 7. If you want the realtime lighting to match it, go to the Ephemeris page Time section and Set. Change the Month to 4, the Day to 7, and the hour to 14 (1400 hours=2 PM).

22. OK out of the Terrain Creation Parameters window and Enviro Startup. The scene will load and drop you in, ready to navigate.

23. Here’s how to navigate in the Panoramic Flyer mode. Viewer response will vary within the scene. Areas of high foliage density will reduce the number of frames per second (FPS). The viewer will pause the first time the 3D Object is encountered as its texture is loaded into memory.

Move the mouse pointer left and right of center to pan left and right, respectively. The more off-center your pointer is, the faster you’ll pan. Move the pointer above and below screen center to pan up and down. Each press of the f key goes faster and s goes slower.

Left-click and move the pointer off-center to fly in the desired direction. The more off-center your pointer is, the faster you’ll fly.

Right-click and move the pointer up and down relative to screen center to change the camera elevation. Right-click and move the pointer left and right relative to screen center to slide the camera left and right.

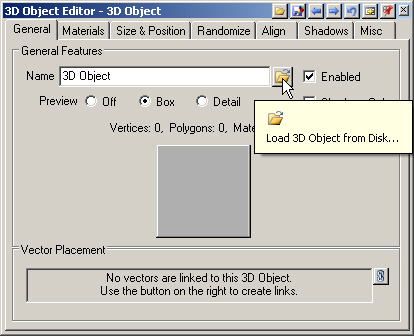
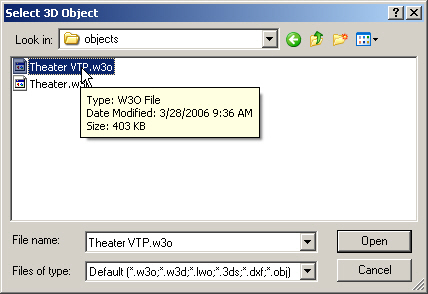
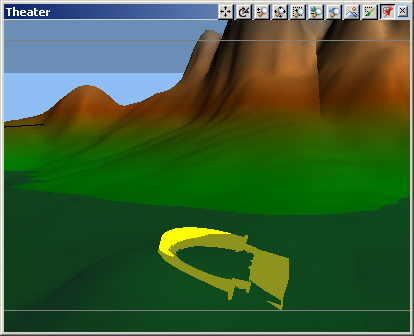
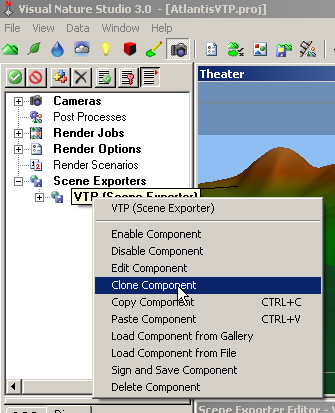
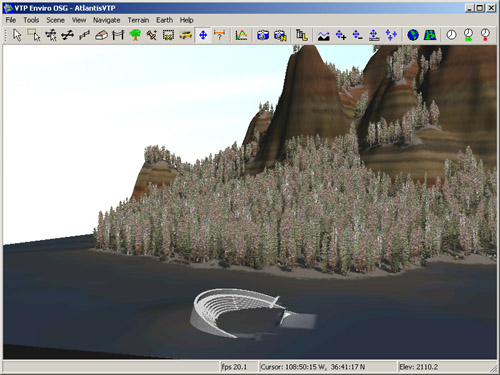
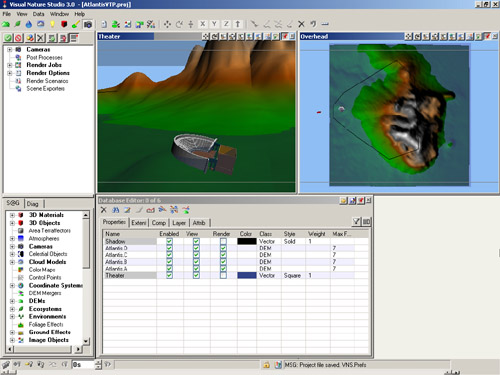
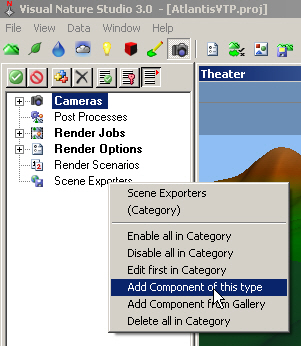
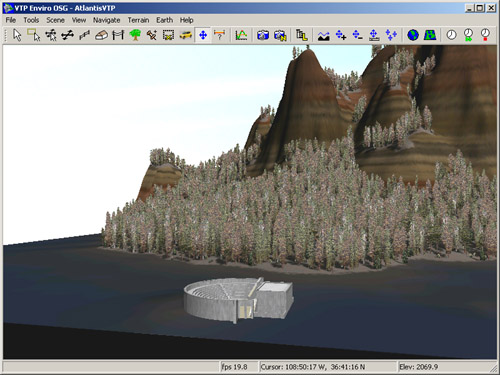
24. The theater has lost its VNS pitch and is resting on the water plane. This is a limitation of the VTP format. The 3D Object must be lowered and pitch and bank applied before import into VNS. Go to the 3D Object Task Mode and add another 3D Object Component. Load 3D Object from Disk Load3DOfromDisk.gif.

25. Navigate to the WCSProjects\SX\objectsfolder and open Theater VTP.w3o.

26. Expand the Theater 3D Object Component in the Scene-at-a-Glance and move the Theater vector to the Theater VTP 3D Object.

27. Add the vector for Position.

28. The vector is already applied to the Theater object, so VNS asks us to confirm the move to Theater VTP and to disable its Geographic Instance rendering. Agree to both.

29. Go to the 3D Object Editor and turn on Detail Preview.

30. The object looks too submerged, but that’s because it’s placed relative to ground elevation (under water). The VTP version of the object will be relative to its ground level, the water plane.

31. Go to the Render Task Mode and clone the VTP Scene Exporter.

32. Change the clone name to VTP2. Change VTP\AtlantisVTP in the Output File target to VTP2\AtlantisVTP. This will create a VTP2 folder in the SX project folder to hold the new VTP files.

33. Export Scene Now to open the Export Control window.

34. Disable the VTP export event and Go to start exporting.

35. Confirm the creation of the new VTP2 directory in the SX project folder.

36. Copy the exported VTP2 files to your VTP Data folder.

37. Launch Enviro and choose the VTP2 terrain. The theater is now tilted and submerged.

38. Exported files from this tutorial are the VTP and VTP2 folders in the WCSProjects\SX\Tutorial Output folder on the VNS 3 DVD. The completed project file is in the WCSProjects\SX\Tutorial Projects folder on your hard drive.

Produced by Scott Cherba for 3DNature

Scroll to top